
What is Pinsa Romana? Is Pinsa Romana the same as pizza? There are different opinions about that. Some call Pinsa also the better pizza – or is that rather just marketing? I’d like to emphasize the characteristics of a Pinsa Romana here and everyone can then form his or her own opinion about it.
A Pinsa Romana dough consists of different flours: a frequently used combination is e.g. wheat, rice and soy flour. In addition, Pinsa Romana dough is characterized by a high water content of 70% – 90% and a comparatively long fermentation time of 24 to 72 hours. Both the flour mixture and the long leavening time make the dough easier to digest. Another typical feature of Pinsa Romana is its oval shape.
For this recipe of Pinsa Romana, a total of 72 hours of resting of the dough is foreseen. So if you want to eat the Pinsa, for example, Saturday evening, you should already start making the dough Wednesday evening.
Ingredients
(for approx. 4 dough pieces à 250 gr)
- 500 gr wheat flour (preferably a Tipo 00 flour with the highest possible protein content (>12 gr))
- 50 gr rice flour
- 30 gr soy flour
- 464 gr cold water
- 3 gr dry yeast
- 14 gr fine salt
- 10 gr olive oil
Dough preparation
For kneading the dough I use my Grilleta IM 5S. Of course, you can knead the dough with other food processors. The total kneading time is about 15 minutes.
- Put the three types of flour in the bowl of the kneading machine and start the machine on slow speed (speed 1).
- Slowly add 370 gr of water (~ 80%) to the flour within 1.5 minutes. The total kneading time in this step is 5 – 6 minutes.
- Now follows the autolysis: put the dough in the covered bowl (alternatively in a sealable box) in the refrigerator for 1-2 hours. During this resting period, a beautiful glowing lattice develops all by itself.
- After the 1-2 hours, sprinkle the dry yeast over the dough in the bowl.
- Start the kneading machine on slow speed (speed 1).
- Pour the remaining water into the dough in small portions. Water should only be added once the last unit of water has been absorbed by the dough and the bottom of the bowl is no longer wet.
- After 3 minutes, you can increase to step 3.
- After all the water has been added, slowly add the salt and then the olive oil.
- In the last 2 – 3 minutes of the kneading time, the kneading speed can be successively increased, so that at the end the dough is kneaded at the highest speed.
- The total kneading time is about 15 minutes.
- Transfer the dough from the bowl to the work surface and shape it into as round a ball as possible with a smooth surface. This is important to keep the air “trapped” in the dough.
- Place dough ball in a sealable container.
Dough rest
- Let the dough rest for one hour at room temperature.
- Then place the dough in the refrigerator for 68 hours.
- After the 68 hours, divide the dough into four portions. One portion should weigh about 250 gr.
- Shape each of the four portions into an oval dough ball.
- Put the dough in a sealable container and let it rise for three hours at room temperature.
Shape, top and bake the Pinsa Romana
- Preheat the pizza oven to 290 degrees at least one hour before baking.
- Prepare a bowl or deep plate with semola (flour will work as well).
- Sprinkle the dough with a little semola (especially on the edges) and take it out of the dough ball box* with a spatula*, put it in the bowl/plate with semola and turn it over.
- Then place the dough ball on the work surface and shape it by hand: if possible, starting from the center, press the air bubbles towards the edge and shape it into a round pizza, leaving a rim. Do not use a rolling pin, as this will destroy the air bubbles.
- Top the pinsa.
- Carefully pull the pinsa onto the pizza peel*.
- Place the pinsa in the oven and bake it for about 8 minutes (a little shorter or longer, depending on your own preference and degree of browning).
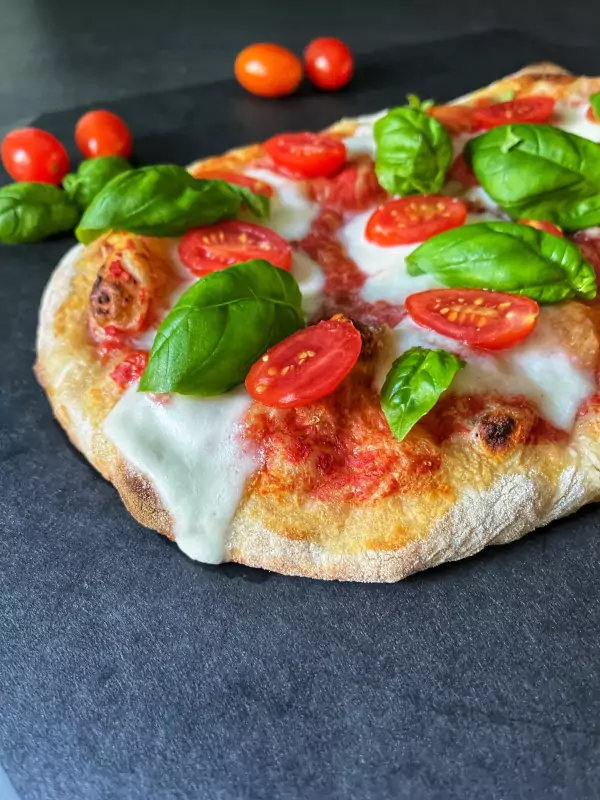
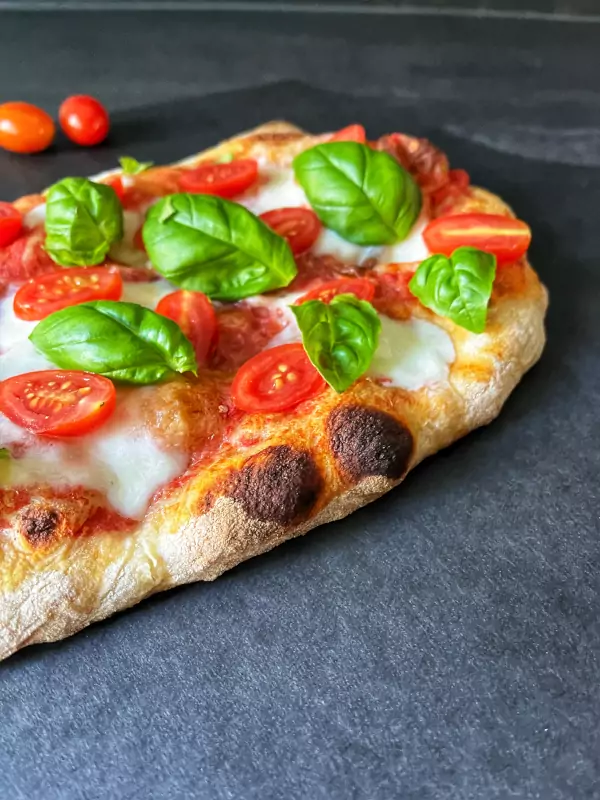
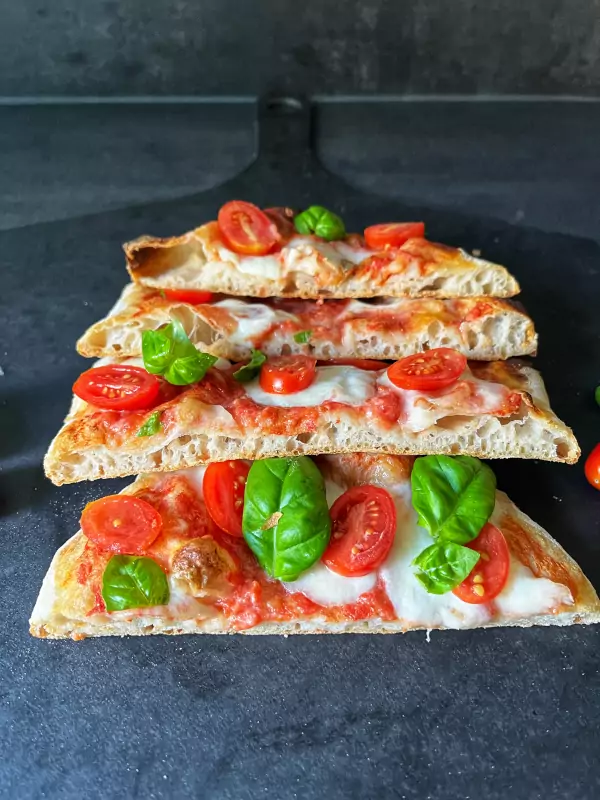
This is what the finished Pinsa Romana looks like
Discover more
You’d like to start making pizza right away, but you’re wondering where to start? We have summarized the most important information on the following page for you.
Thanks for reading! I hope this Pinsa Romana recipe was valuable to you. If you have any unanswered questions, feel free to let me know in the comments. I’d appreciate it if you could share this article with your friends.
Julia