
Honestly folks, the Detroit Style Pizza is one of the tastiest pizzas I’ve ever eaten, and I’m sure you will, too. My impression is that it is still relatively unknown in Germany, but definitely deserves more attention in the pizza community because of its phenomenal taste. The Detroit Style Pizza is not a “classic, round” pizza, but a deep pan pizza. Legends say that Detroit Style Pizza was invented in 1946 at a pizzeria called Buddy’s Rendezvous. There they baked the pizzas in rectangular trays made of blue steel, which were actually intended for use in auto parts factories. The thick but light and airy dough was pressed out in the pans, cheese and toppings were added, then the sauce, and the Detroit Style Pizza was born.
Fun fact: In 2012, Shawn Randazzo won the Las Vegas International Pizza Expo World Championship with a Detroit Style Pizza!
What makes a Detroit Style Pizza so special?
The Detroit Style Pizza is characterized by the following features:
- The dough. It is a relatively wet dough, so it is very light inside and crispy outside. The water content is usually at least 70% or higher. Because of the high hydration many of the complex ingredients are already broken down, making it easier to digest. So the dough is very important to the authenticity of this style.
- The shape. Detroit Style Pizza is baked in a sheet pan that is either square or rectangular.
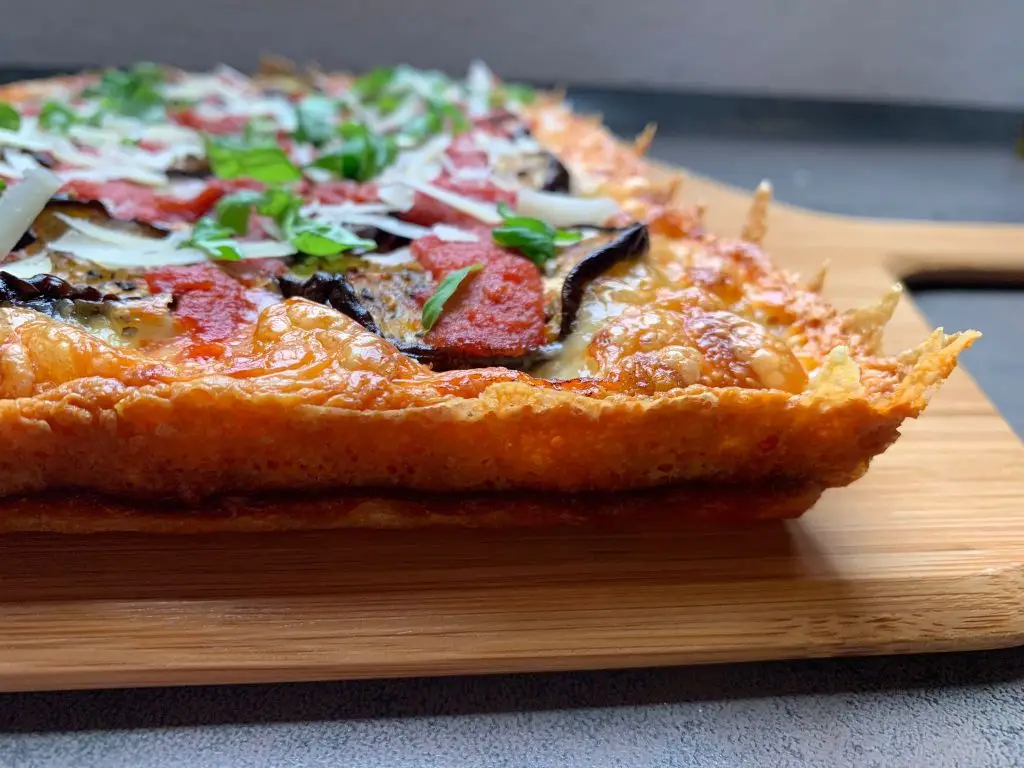
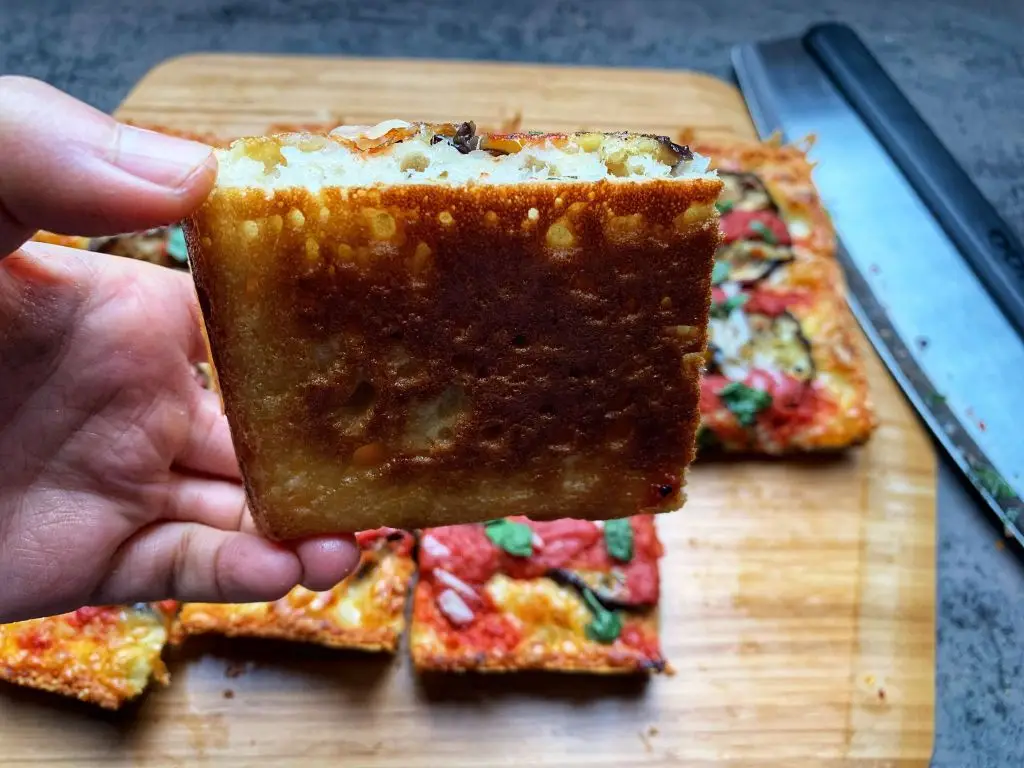
- It is a deep dish pizza. Meaning that the Detroit Style Pizza is about 1 inch high. However, the dough is not heavy, on the contrary, it tastes very light due to the high hydration.
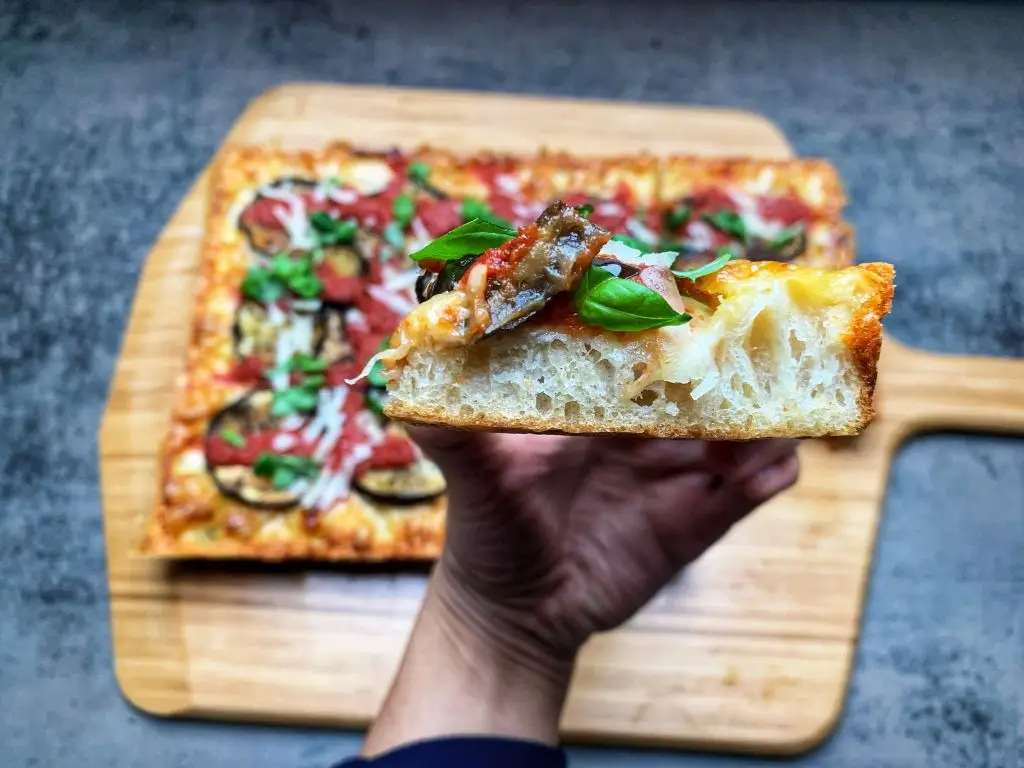
- The cheese. Traditionally, grated brick cheese from Wisconsin is used (a kind of mild cheddar) for Detroit Style Pizza. Since this is not available everywhere, alternatives such as cheddar, mozzarella, etc. can of course be used. Also important is the way the cheese is applied from edge to edge so that it caramelizes around the sides to form a crust, this cheese crust is also called frico. That’s a lot of people’s favorite part of this type of pizza, by the way.
- The sauce on top. Unlike traditional pizzas, the tomato sauce is not spread on the dough before the ingredients, but after. This can be done either before or after baking
But now enough theory, now you certainly also want to know how to make a Detroit Style Pizza yourself.
This recipe calls for at least 24 hours and up to 72 hours dough resting time. The great thing is that this Detroit Style Pizza recipe doesn’t require a dough mixer. You just need your hands and some time because this dough is not kneaded (also called no-knead dough), it is just folded several times, but this still builds a strong gluten network to make the pizza light and airy. This method is chosen because the dough is relatively wet (about 80% water content), which makes it difficult to knead.
The Detroit Style Pizza is baked in a high rectangular pan. From my own experience, I can recommend the pans from Lloyd Pans. They are made of anodized aluminum, are non-stick coated and heat resistant up to 270 degrees. For the Detroit Style Pizza there is a small pan* (8 x 10 inch) and a large pan* (10 x 14 inch).
Regarding the amount of dough, I recommend 300 to 400 grams of dough for the small pan and 500 to 600 grams of dough for the large pan.
You can also find more information about the pans on the equipment page.
Ingredients
(for two portions of 500 gr for a baking pan of 10 x 14 inch)
- 570 gr flour (ideally one with a high protein content (> 12 gr))
- 15 gr salt
- 2 gr dry yeast (or 6 gr fresh yeast Hefe)
- 450 gr water (ideally cold water)
- 15 gr olive oil (1 tablespoon)
Ingredients for the topping of one Detroit Style Pizza
- 200 gr tomato sauce
- 150 gr grated cheese (e.g. mozzarella, cheddar, gouda or other mixtures)
- Optional: vegetables or meat of choice (e.g. mushrooms, peppers, zucchini, pepperoni etc.)
Making the dough
- First mix together flour, salt and dry yeast in a bowl.
- Now mix water and olive oil together in another bowl.
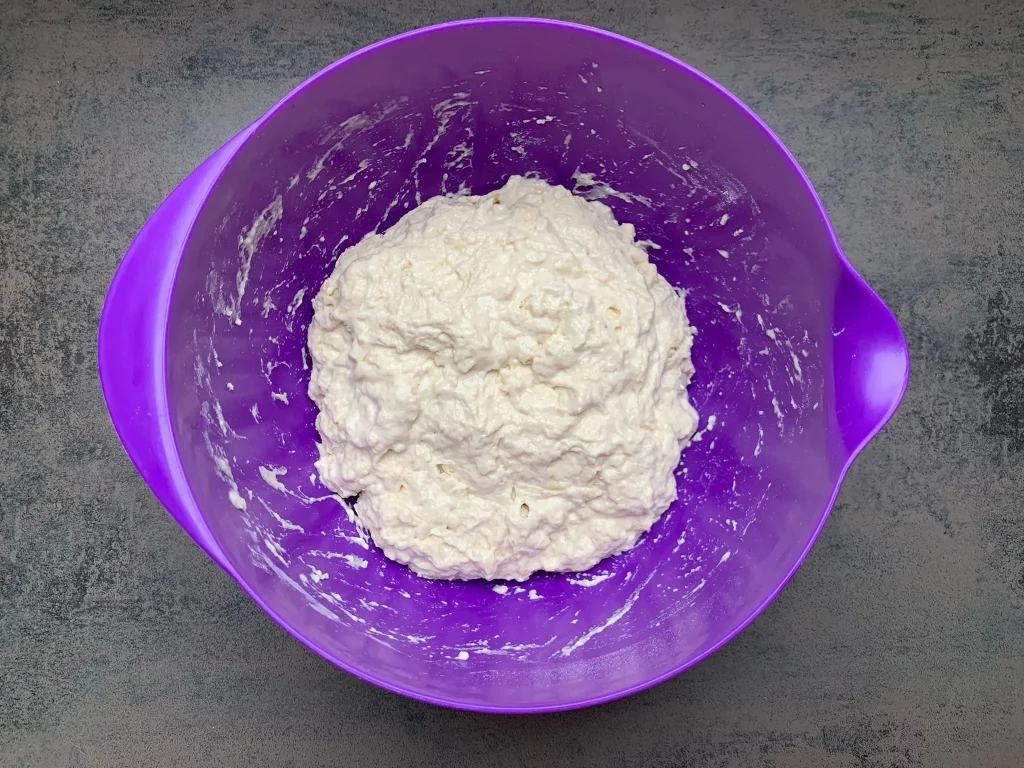
- Add the wet ingredients to the dry ingredients and mix coarsely with a spoon so that no dry residue remains.
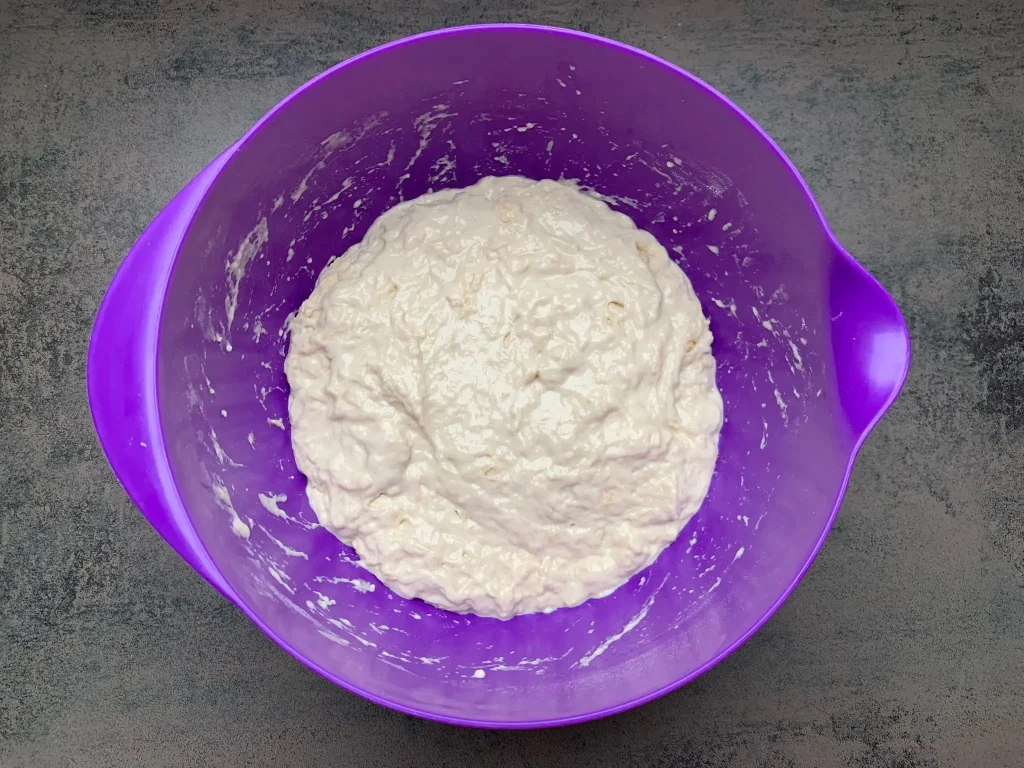
- Now cover the bowl (e.g. with cling film or a lid) and let it stand at room temperature for one hour. During this time, the flour can completely hydrate and build up an initial gluten network that makes the dough strong. You can also see nicely in the lower right picture how the flour has swelled and the dough has developed into a more cohesive mass.
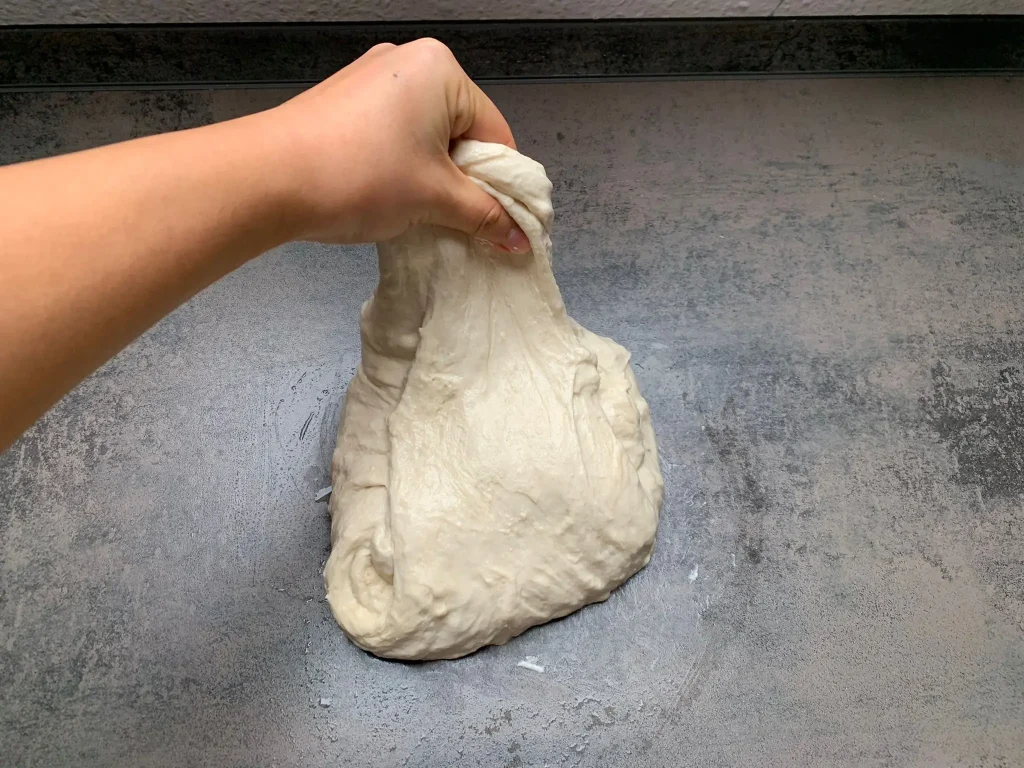
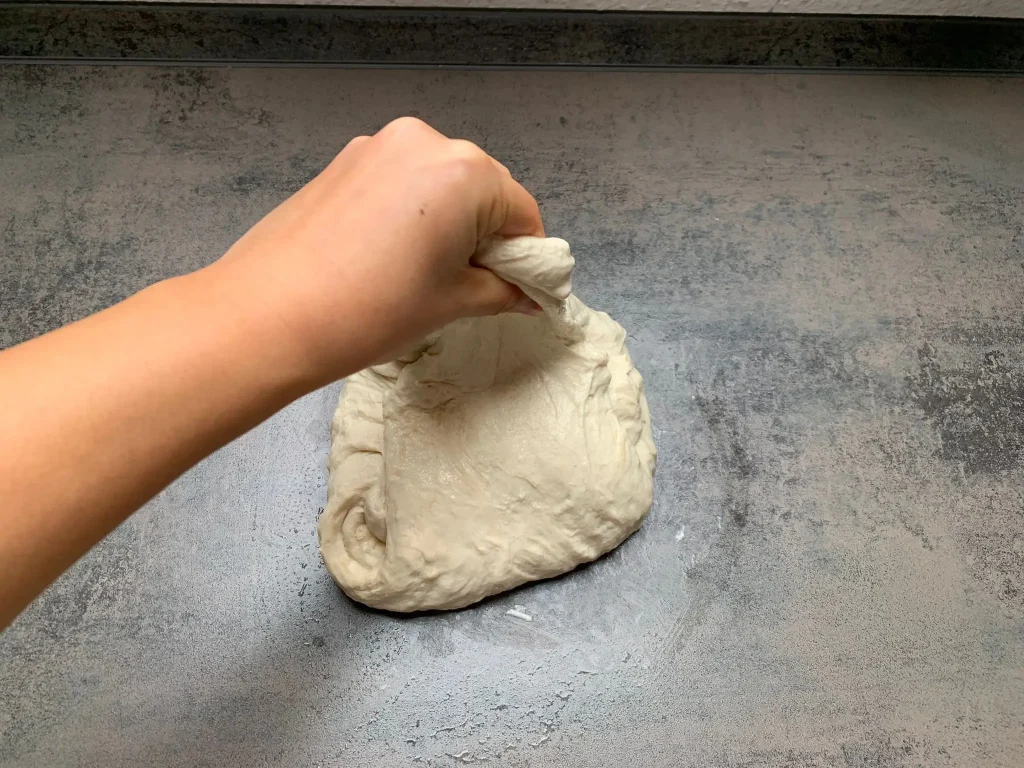
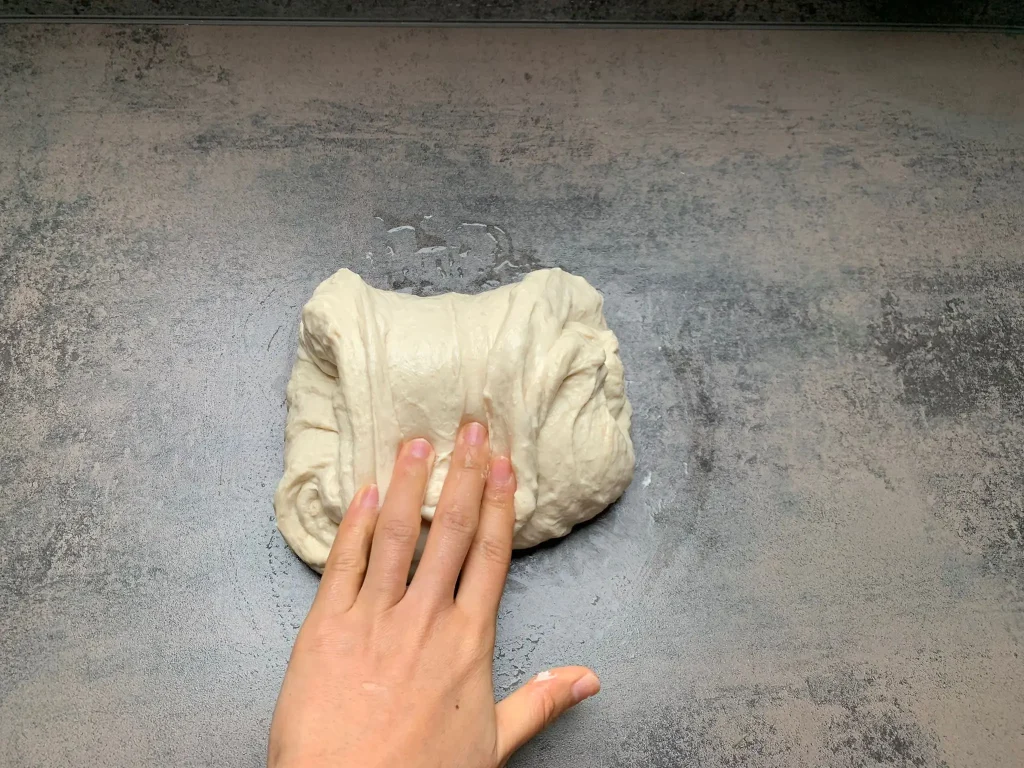
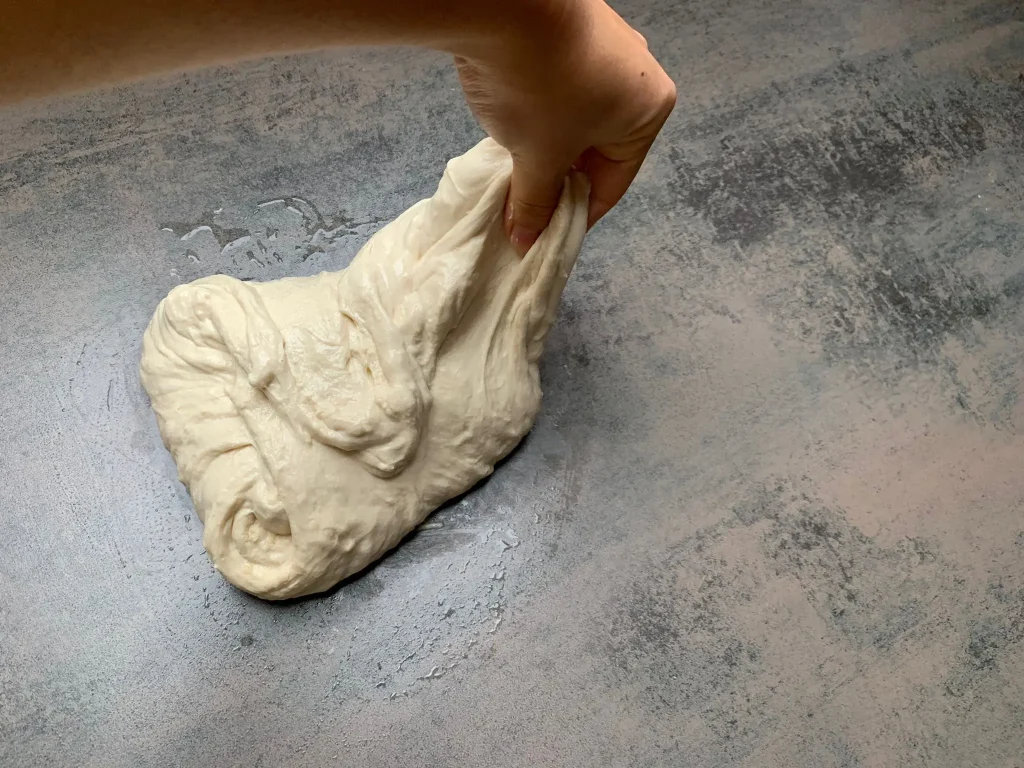
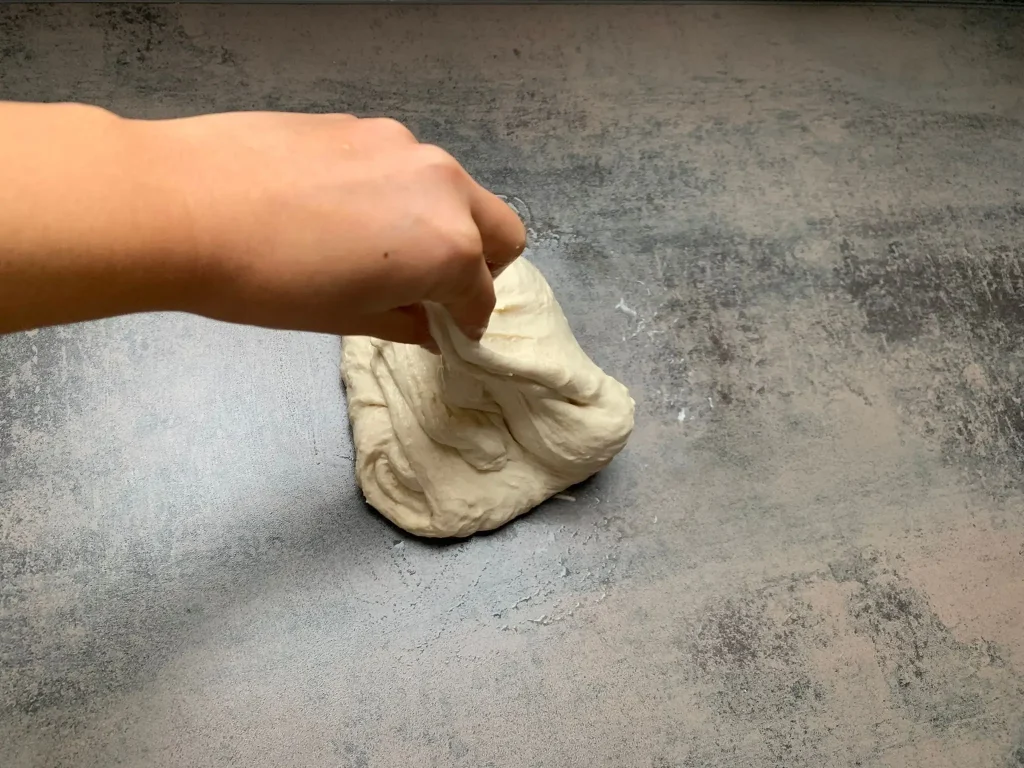
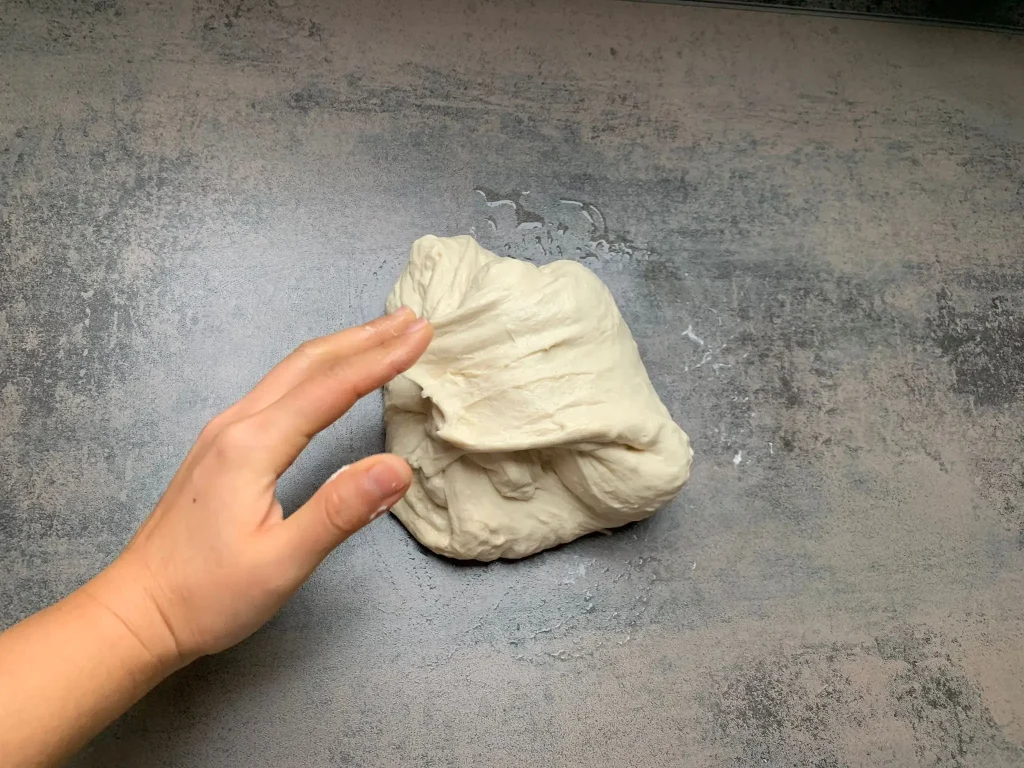
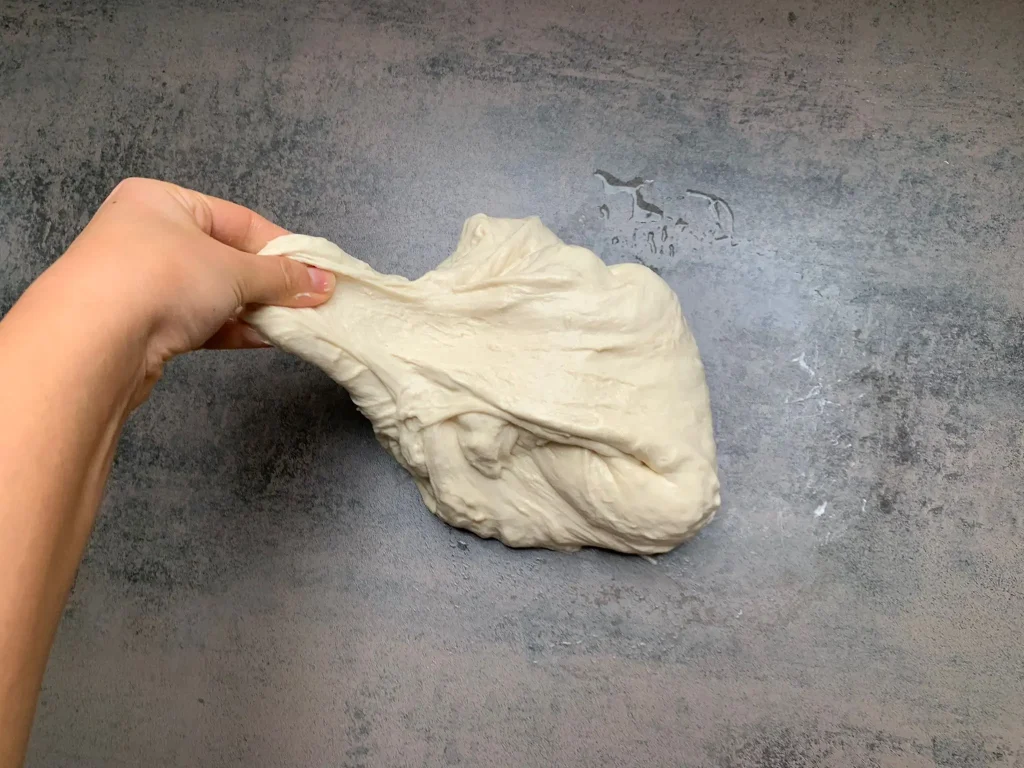
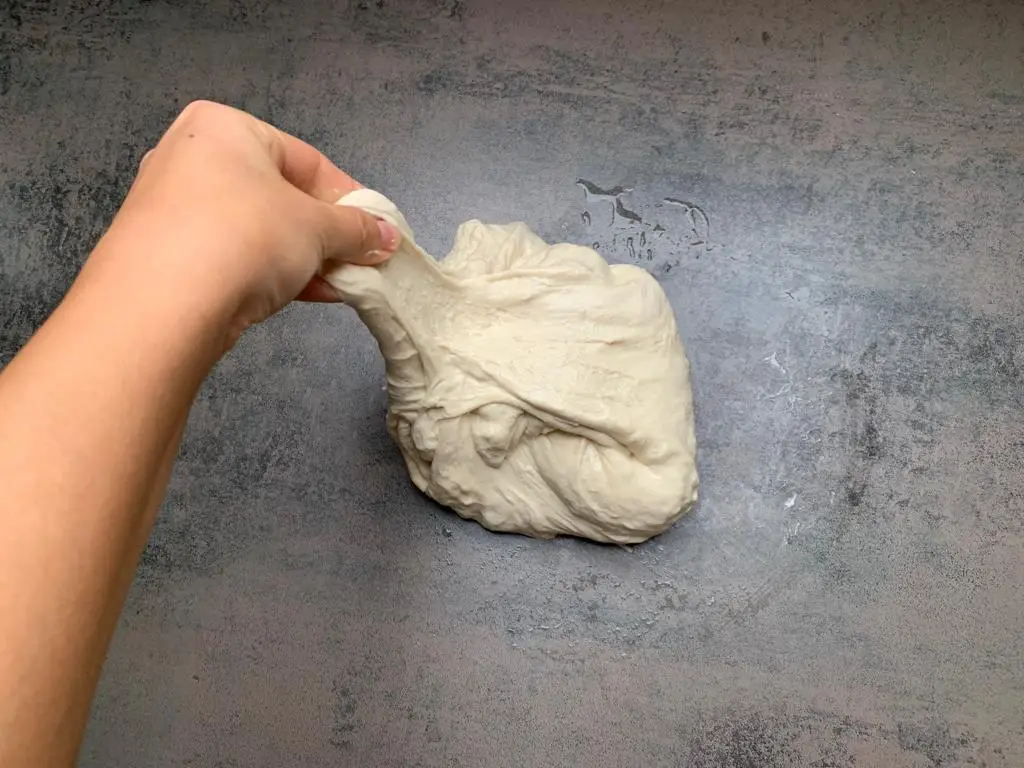
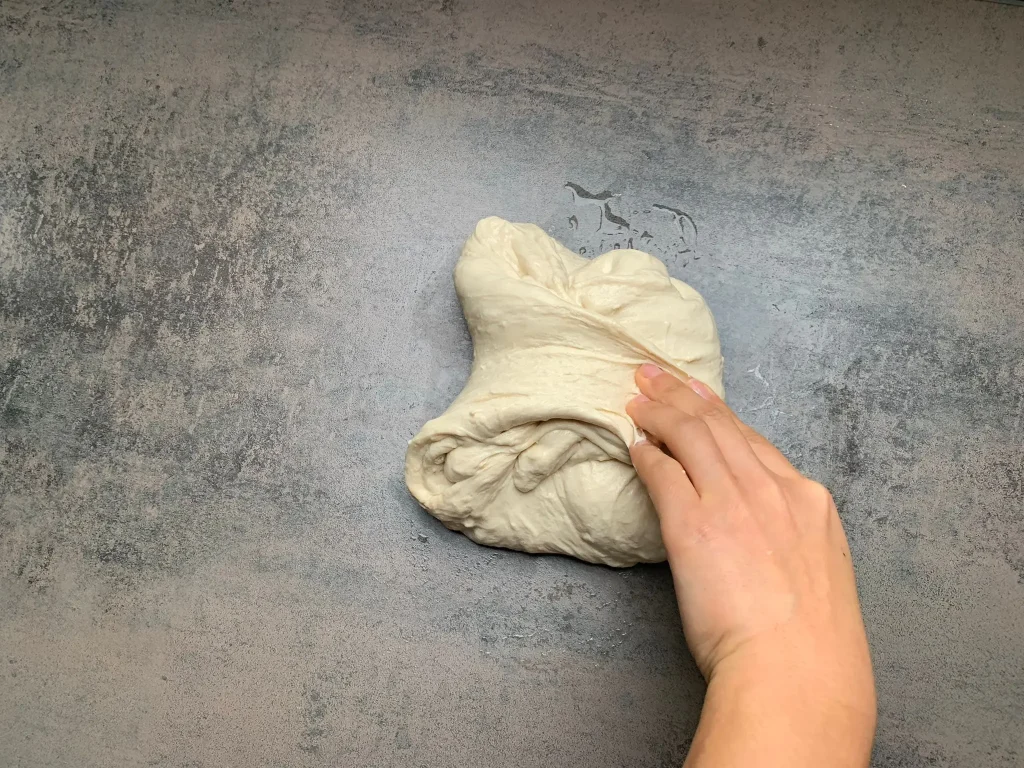
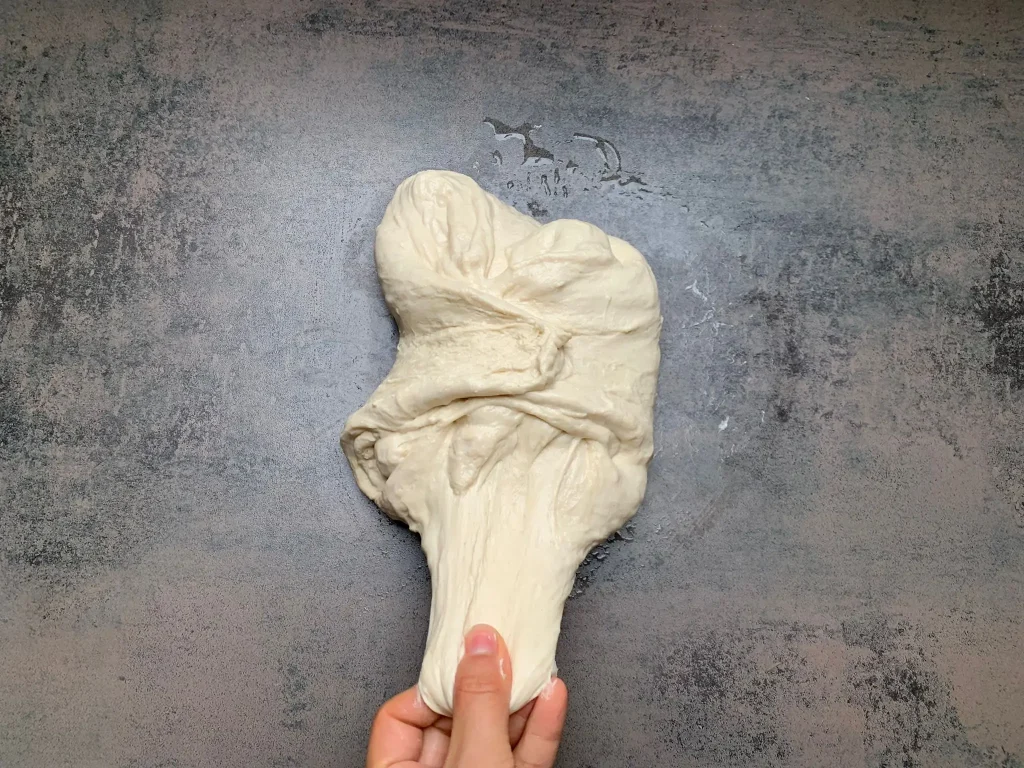
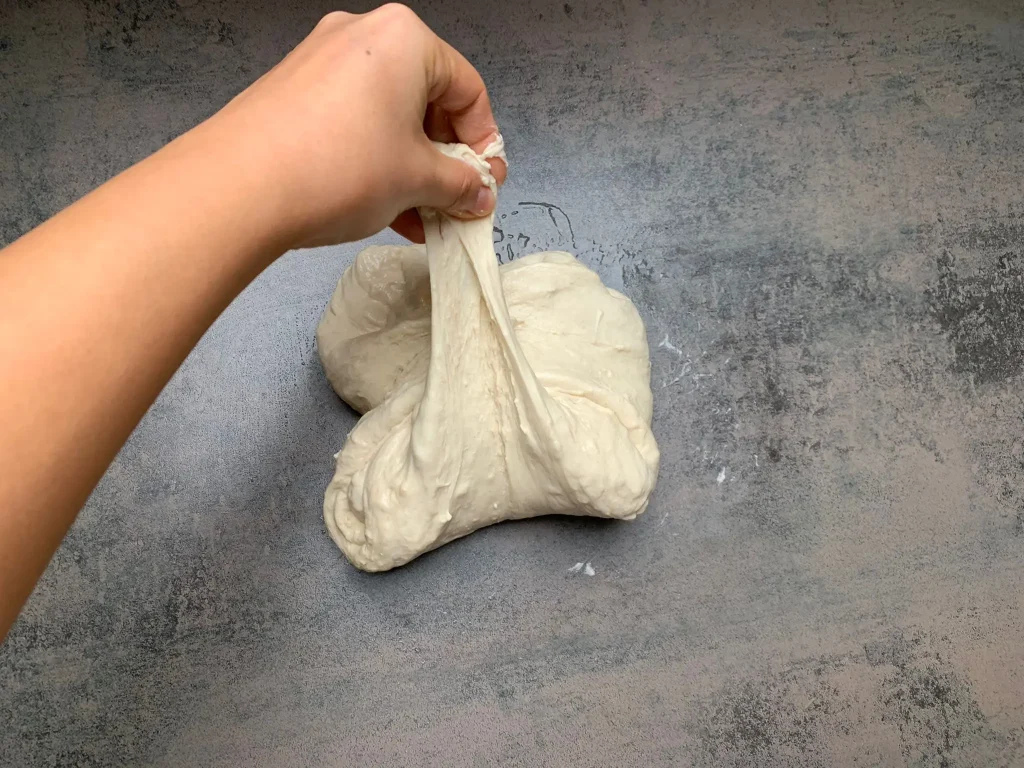
- Then rub the work surface with a little water and put the dough on it. At this point, the dough will certainly still resemble a wet and sticky mass – but don’t worry, this will change. Now wet your hands with a bit water and pull the dough from all four sides (top, left, right, bottom) one by one from the bottom to the top and fold it in the middle. This technique is also called stretch and fold, and ensures that air is worked into the dough on the one hand and that the gluten structure is strengthened on the other. Both ensure that the later dough becomes nice and airy. The dough may still look like an bulky mass at this point but just be patient. Cover the dough with the bowl and let it rest for 20 minutes.
In the series of pictures below I show you step by step the Stretch and Fold technique from all four sides and how the dough looks afterwards.
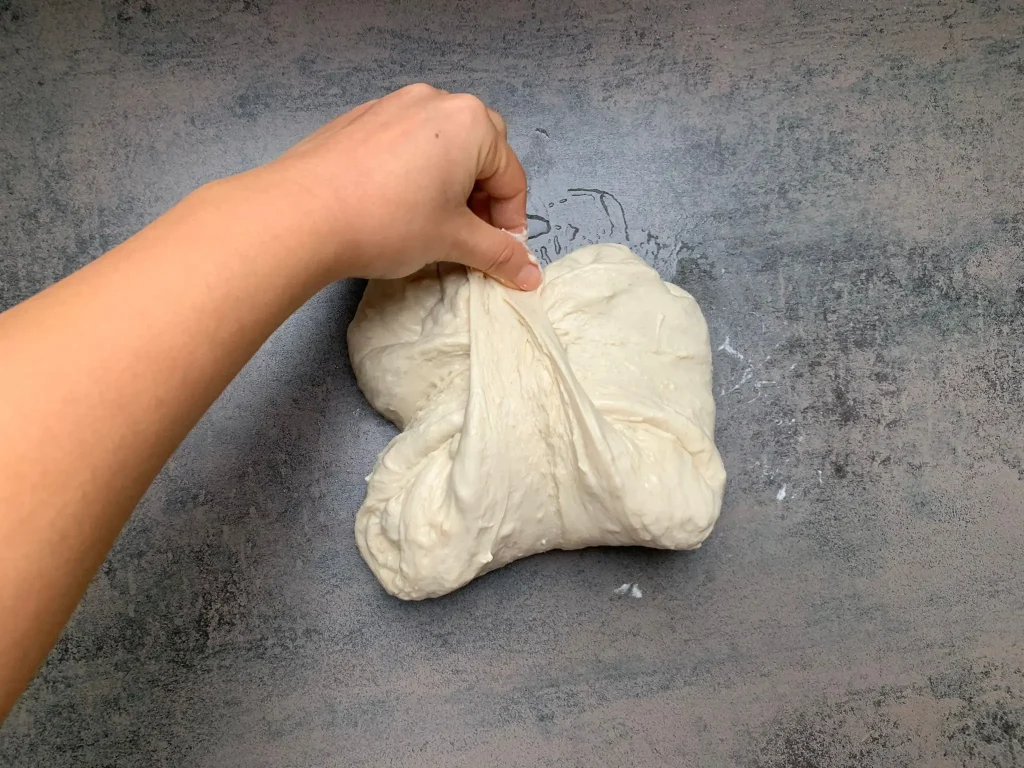
- Then repeat the whole process and pull the dough again from all four sides one after the other from the bottom to the top and fold it in the middle. You may already notice that the dough has become a bit more stable after these 20 minutes.
- Now cover the dough with the bowl, let it rest again for 20 minutes and then repeat the folding units again from all four sides.
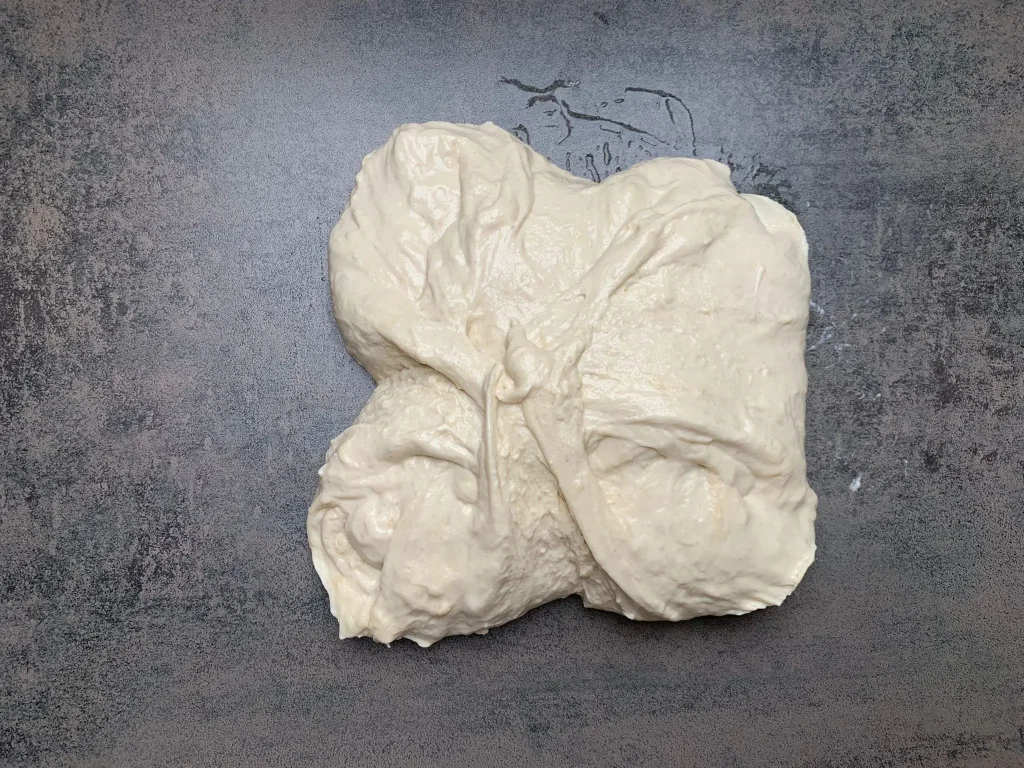
- You should plan for a total of 3 folding and resting sessions which is 1 hour. With each folding and resting session you will notice that the dough becomes more and more stable and firm – a sign that the gluten network is developing.
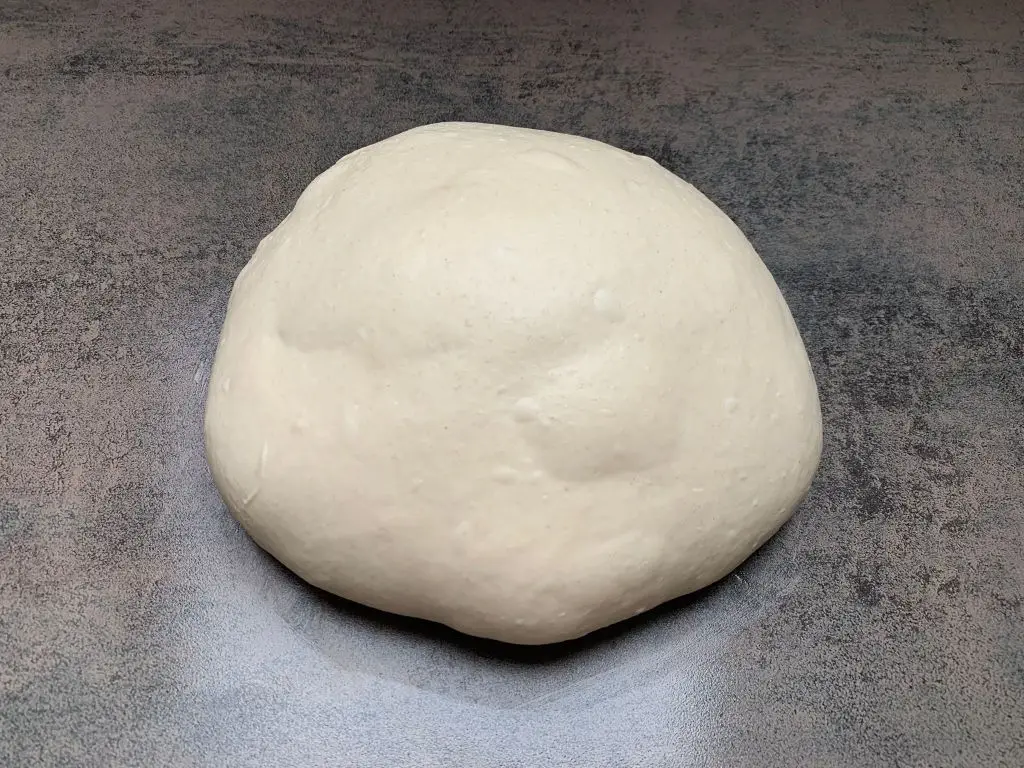
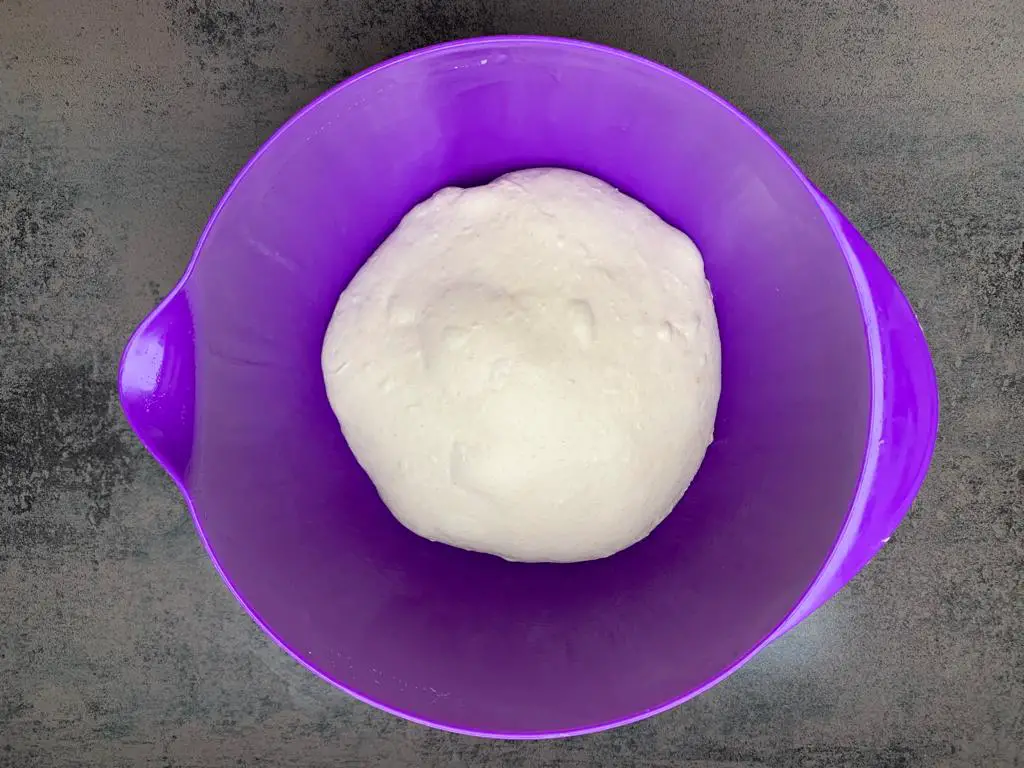
- After the last folding unit, you should be able to shape the dough into a round ball (see picture above, you can also see how to shape the dough round in this video). Lightly oil a sealable bowl, place the dough ball inside and cover.
Resting the dough
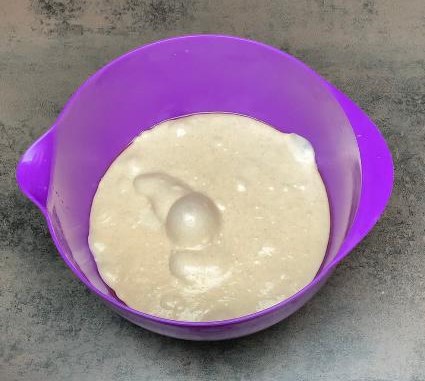
- Now refrigerate the dough for at least 24 hours or up to 48 hours. In the two pictures below you can see the dough before and after resting in the refrigerator.
- Then rub the work surface with a bit water, put the dough on it, divide and weigh it into two equal portions. Then form each portion back into a ball (e.g. using the folding method or as in this video).
- Place each dough ball in a lightly oiled container, cover it up and refrigerate for at least 12 hours or up to 24 hours.
Forming Detroit Style Pizza
- Take the dough out of the refrigerator 4 – 5 hours before baking.
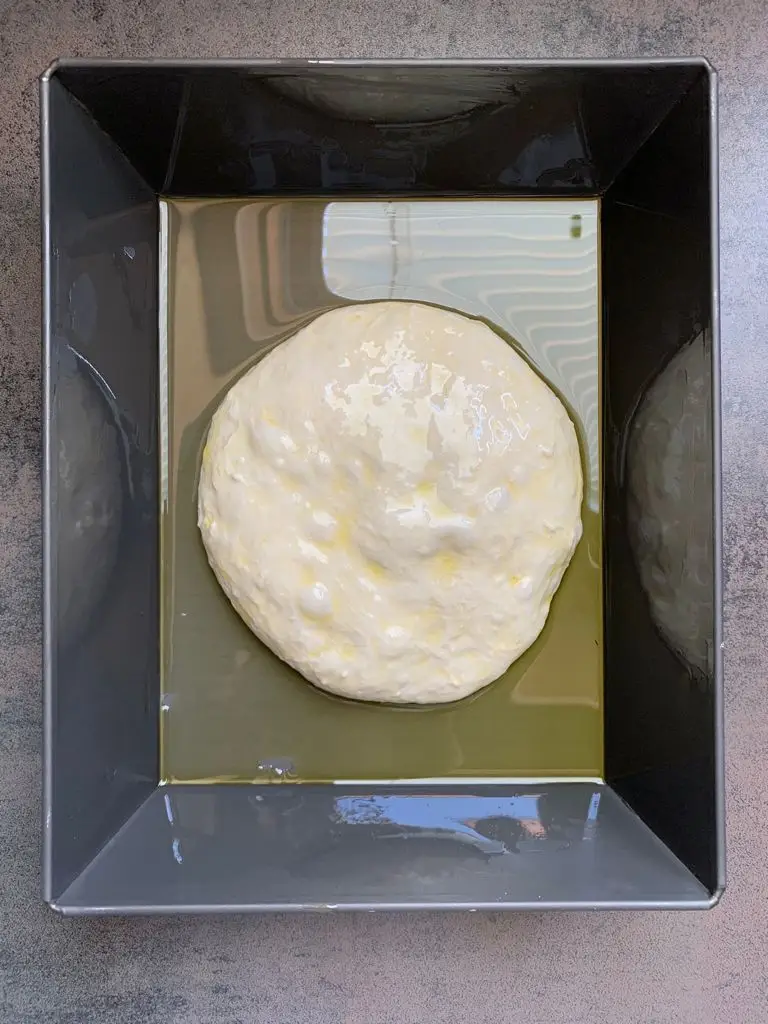
- Generously brush the inside and bottom of the pan with olive oil.
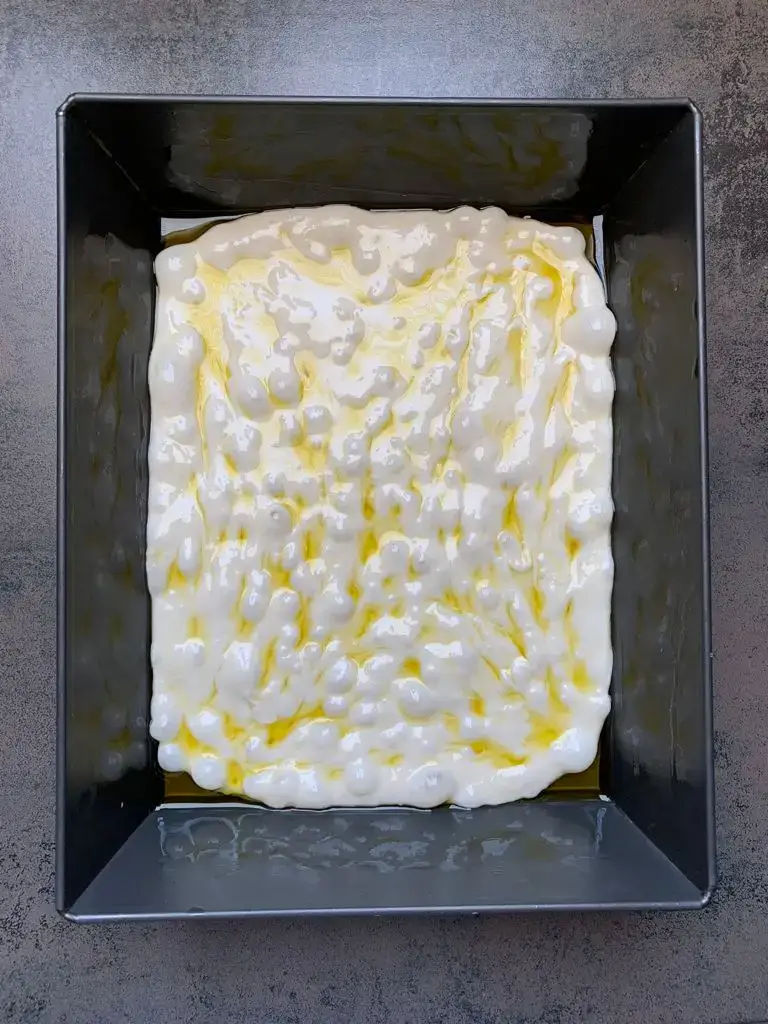
- Put the dough in the pan, put some olive oil on the surface and rub it in so that it is covered with oil on all sides (see picture). And yes, this may look like a lot of olive oil but you want the dough to be able to slide easily during the next steps and not stick in the pan.
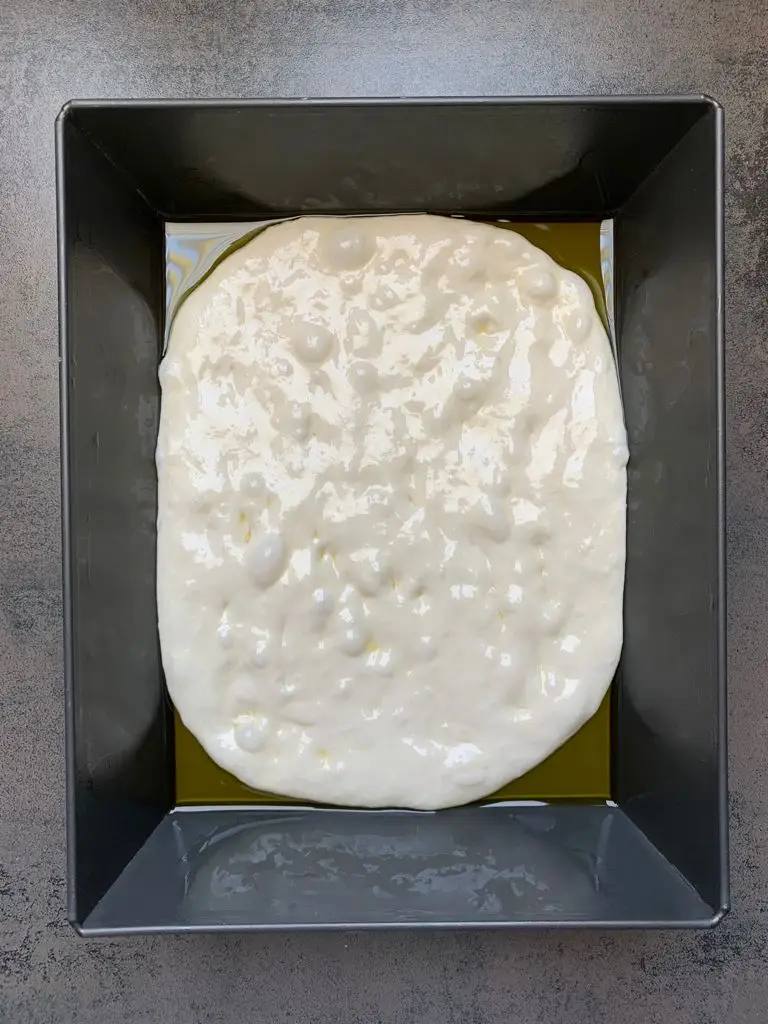
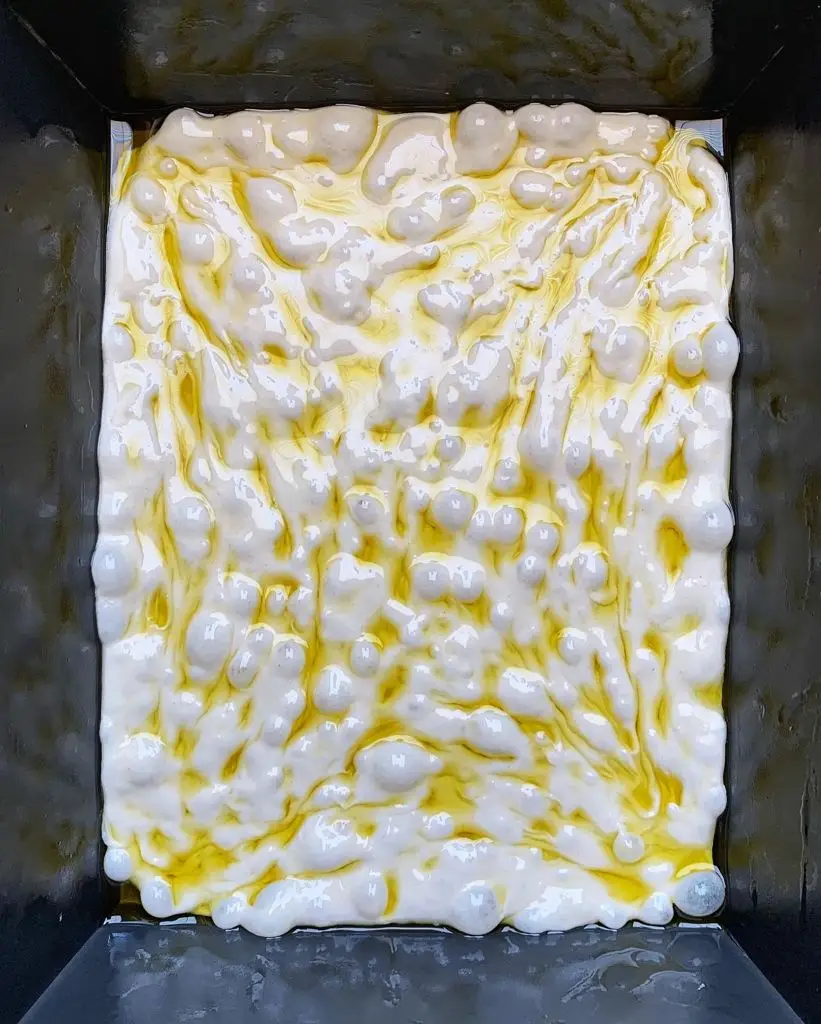
- Now, using your fingers, press the dough evenly in the pan towards the corners so that it fills the pan. This will not work completely the first time. But this is not a problem and is normal. Now cover the pan (e.g. with aluminum foil), and after 20 minutes repeat the procedure with your fingers. Repeat this process of covering the tray and spreading the dough with your fingers after 20 minutes a total of 3 to 4 times, so a total of 1 to 1:20 hours will pass. After the third or fourth interval, the dough should completely fill the pan. If the corners are not completely filled because the dough pulls back slightly, it is not a big deal.
- Now cover the pan and let the dough rest for 4 hours.
Topping and baking Detroit Style Pizza
- Preheat the oven 30 minutes before baking to 250 degrees Celsius (ideally preheat it with a pizza stone or baking steel, the preheating time should then be at least 45 minutes).
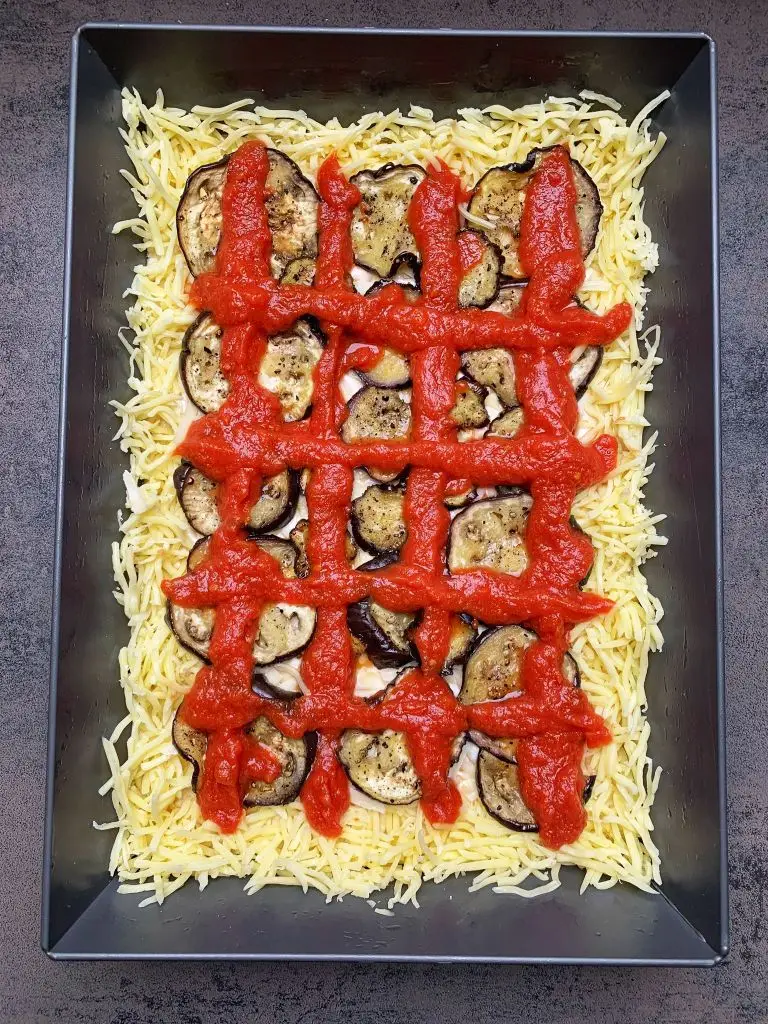
- Spread the grated cheese generously along the edges of the pan and on the dough. Optionally, spread the other ingredients such as vegetables or meat on the dough.
- The tomato sauce can now be spread on the pizza in strips either before or after baking. I have tried both variants and I personally prefer to put the sauce on the pizza before baking, because it thickens a little more and is warm when eating.
- Place the pan in the oven and bake for 15 minutes.
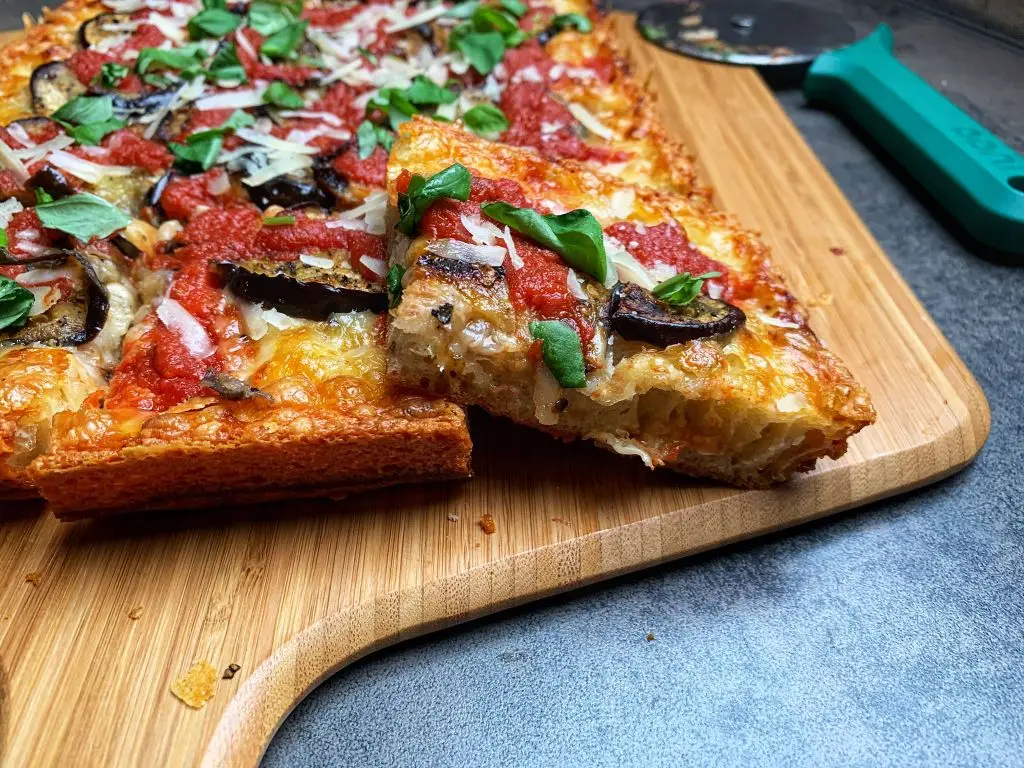
- After baking, remove the pan from the oven. Let the pizza rest in the pan for 1-2 minutes, then carefully run a spatula or thin knife along the crust and loosen the pizza from the edge of the pan. Then, using a thin spatula, remove the pizza from the pan and transfer it to a cooling rack. Let the pizza rest there for 1 minute and then transfer it to a wooden board, cut the pizza and serve.
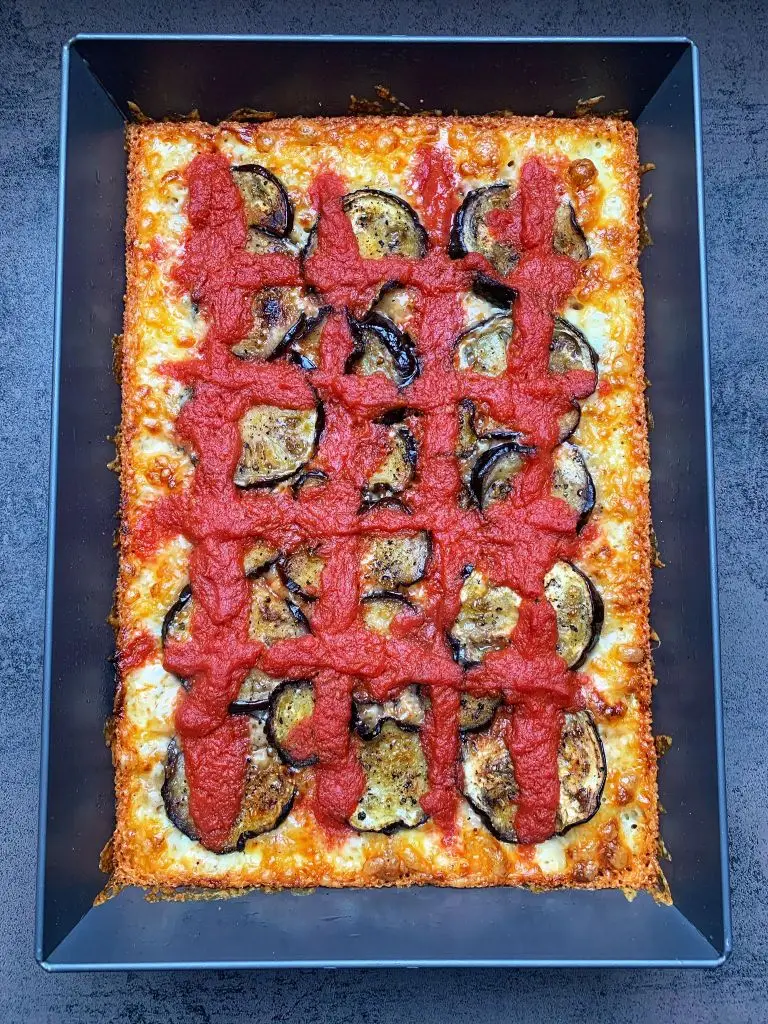
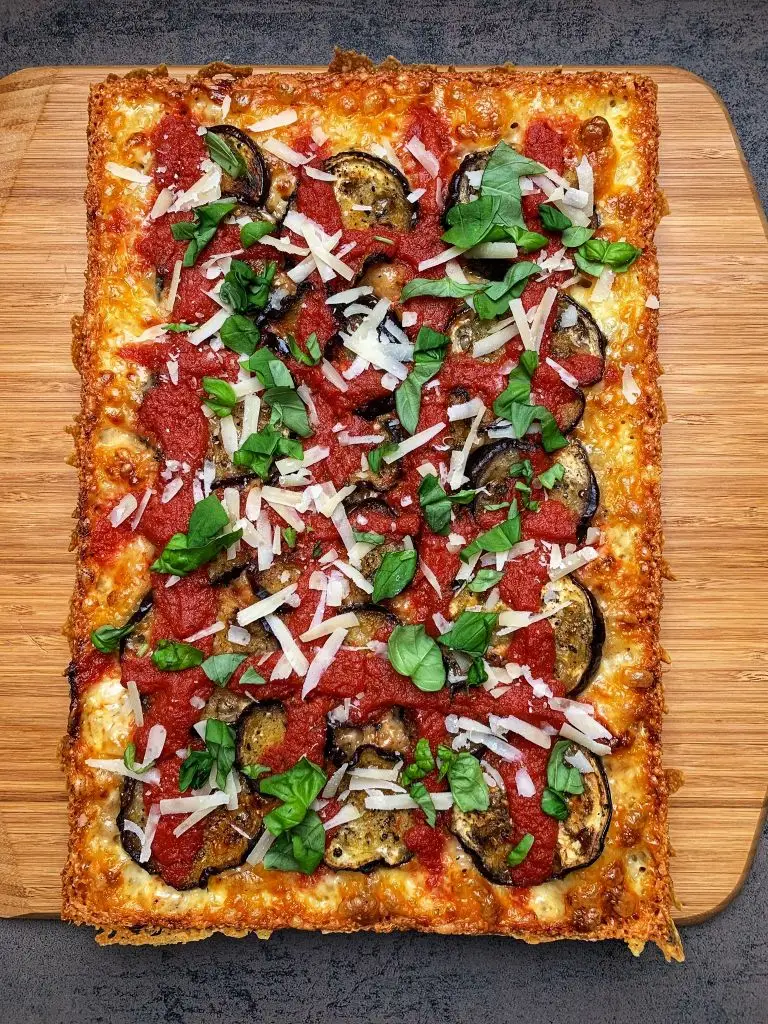
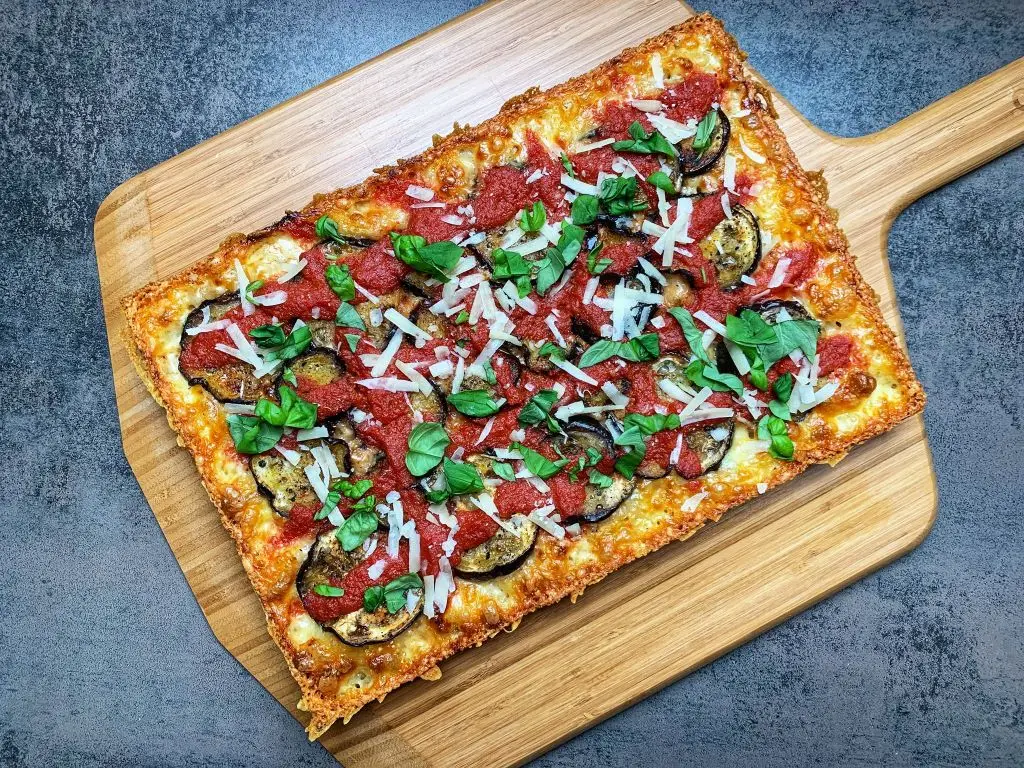
This is how the finished Detroit style pizza looks like
Discover more
You’d like to start making pizza right away, but you’re wondering where to start? We have summarized the most important information on the following page for you.
Thanks for reading! I hope this page about the Detroit Style Pizza was valuable to you. If you have any unanswered questions, feel free to let me know in the comments. I’d appreciate it if you could share this article with your friends.
Julia
Very good recipe, very important to have the right pan tho. But still very good.
Thank you Mathias. Having the right pan is definitely very important for this style of pizza.