Having the right equipment definitely makes baking pizzas easier, but as with all hobbies, there’s an overwhelming amount of stuff you can buy. I’ve bought a lot of pizza equipment over the last few years – and I have to be honest: I wouldn’t buy all of it again today. So please don’t be put off by all the equipment I’m going to list. The most important things can be reduced to the essentials, and the rest was rather purchased because of my own curiosity and joy of experimenting. I will therefore show which of the following equipment I’d consider essential, recommendable and nice to have and also provide the corresponding links* if you’re interested to learn more about the products.
Making the pizza dough
Bowl
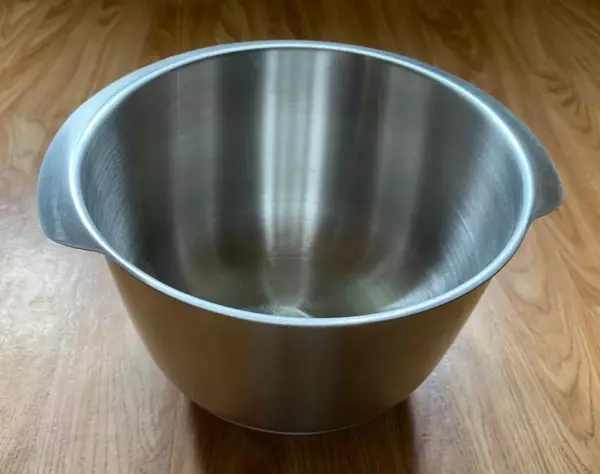
You need bowls to mix ingredients or to let the dough rest. The bowl above is only meant to be representative of any bowl, as surely everyone has a bowl at home. Of course, it is even more practical and sustainable if the bowl can be closed with a lid, so you don’t need cling film to cover the dough.
Rating: essential
Learn more: Mixing bowl*
Scale
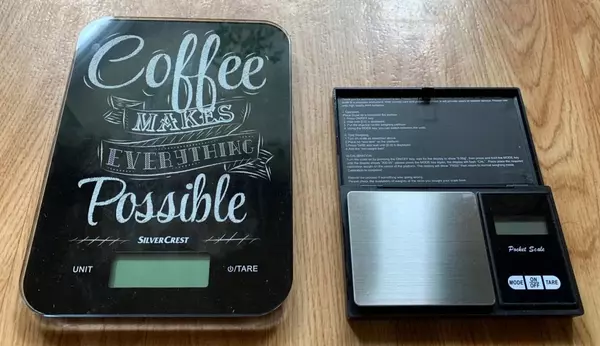
Baking pizzas is a very precise process. That’s why you should use a scale to weigh the ingredients. To weigh flour or water, for example, you can use a conventional kitchen scale (on the left in the picture). However, when it comes to weighing out 1.3 grams of yeast, for example, a normal kitchen scale can reach its limits and no longer show this at all. For this, I would recommend a precision scale (on the right of the picture) that can weigh to the decimal point.
Rating: essential
Learn more: Kitchen scale* & Precision scale*
Dough scraper
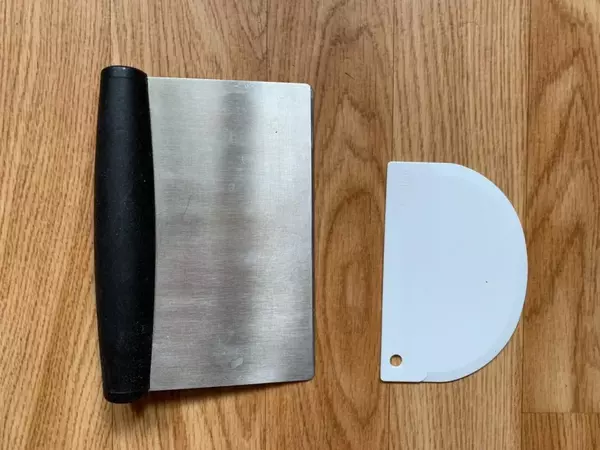
The dough scraper is an inexpensive and practical tool: it not only helps to scrape the leftover dough out of the bowl but is also particularly helpful when dealing with wet doughs (> 70 % water content), e.g. for folding in the no-knead method or for shaping the dough. The stainless steel dough scraper can also be used to divide the dough into smaller pieces. I use both a stainless steel dough scraper and a plastic dough scraper (right in the picture).
Rating: essential
Learn more: Stainless steel dough scraper* & Plastic dough scraper*
Spatula
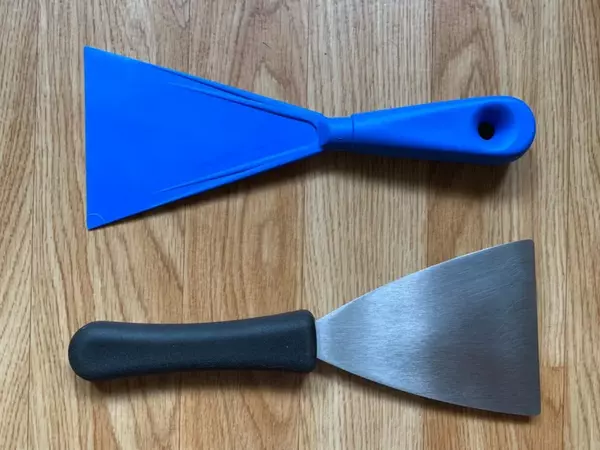
I strongly recommend using a spatula to gently remove the dough pieces from the dough ball box without touching them too much. I prefer to use a stainless steel spatula (pictured below). However, if you ever store the dough balls in a Tupperware box and don’t want to scratch it, you can also get a plastic spatula (pictured above).
Rating: essential
Learn more: Stainless steel spatula* & Plastic spatula*
Dough mixer
Of course, you can knead the dough by hand. I did that myself for a while. However, I found that I could not achieve the quality I wanted from the dough with my hands. Moreover, kneading by hand can be also more exhausting if you want to make a larger quantity of dough for several guests, for example.
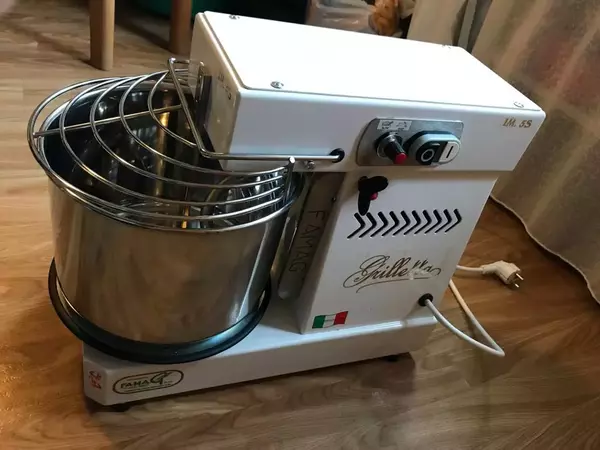
I therefore decided to upgrade. Through internet research, I read a lot of good things about the Grilletta kneading machines from the manufacturer Famag. I decided on the Grilletta IM-5S because it had 10 speed settings and a removable bowl. And what can I say? The dough quality cannot be compared to anything I had seen before. You can’t get anything like that by hand (unfortunately). The dough comes out looking almost like ice cream. It can also produce flour quantities of up to 3 kg and also doughs with high hydration (> 70 % water content) or biga doughs.
However, it has to be a well-considered decision. Because firstly, with its 23 kg, it is not exactly the smallest and lightest machine and secondly, it is also not a bargain (purchase price 19.01.2019: 876.40 euros). I don’t want to say that I can’t do without a kneading machine, but I’m very satisfied with the quality of the dough and wouldn’t want to miss it anymore.
Rating: recommendable
Learn more: Grilleta IM 5S
Temperature measuring instrument
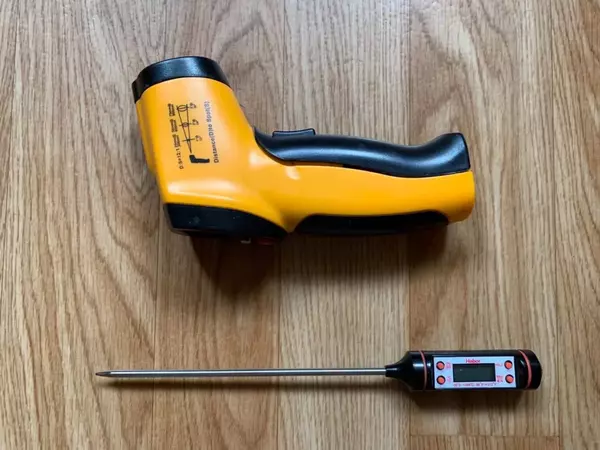
The temperature of the dough plays an important role. The dough should not be too warm, otherwise the yeast activities are amplified unnecessarily fast and this could lead to over-proofing. Ideally, the dough should have a temperature of about 23 degrees after kneading (of course, it is not the end of the world if it is above that, happens to me, too). To measure the dough temperature, I recommend a kitchen thermometer (bottom of the picture).
An infrared thermometer (top of the picture) is also a useful tool to measure the temperature of the oven or pizza stone.
Rating: recommendable
Learn more: Kitchen thermometer* & Infrared thermometer*
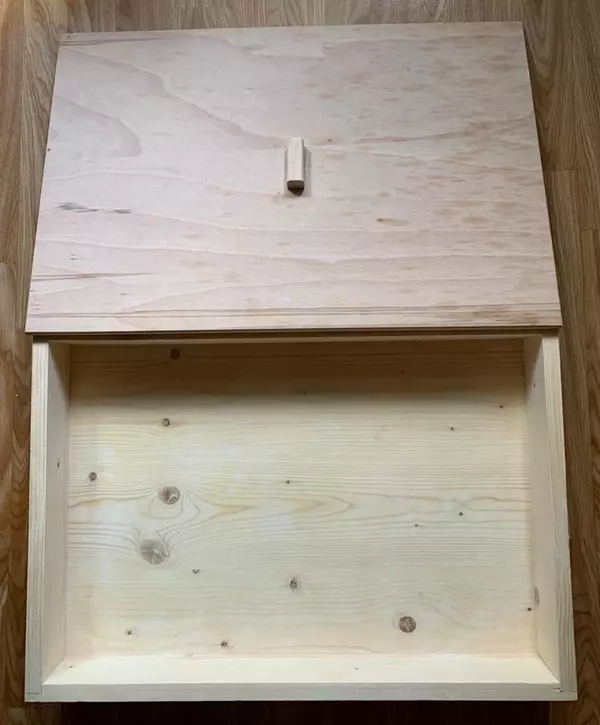
Dough ball box
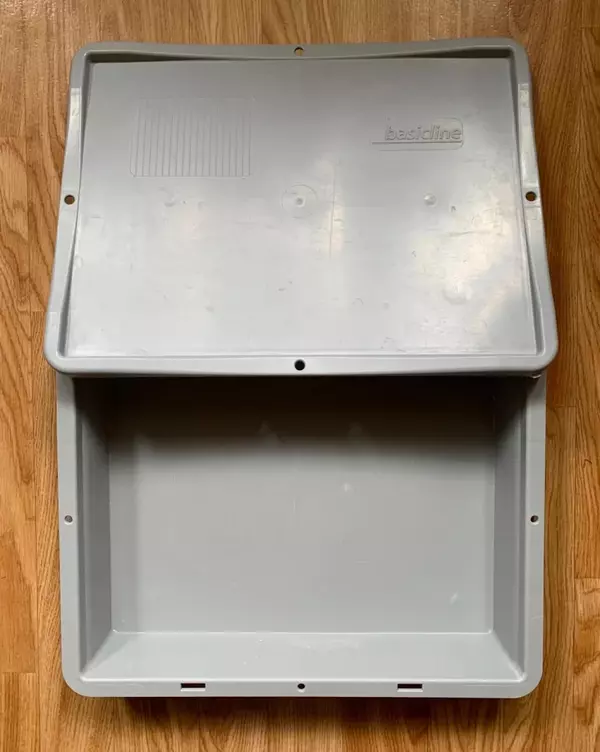
When the dough is divided into smaller portions (dough balls), it needs a storage place for the dough balls. This dough ball box with a matching lid turned out to be ideal because on the one hand, it was developed for the food sector and therefore is made out of food-safe material. On the other hand, six dough balls fit perfectly inside the box and the box with its dimensions 30 x 40 centimeters even fits in my small fridge. Of course, you can also use small individual Tupperware boxes. However, these should be oiled a little beforehand so that it is easier to get the dough pieces out afterwards.
Rating: recommendable
Learn more: Dough ball box*
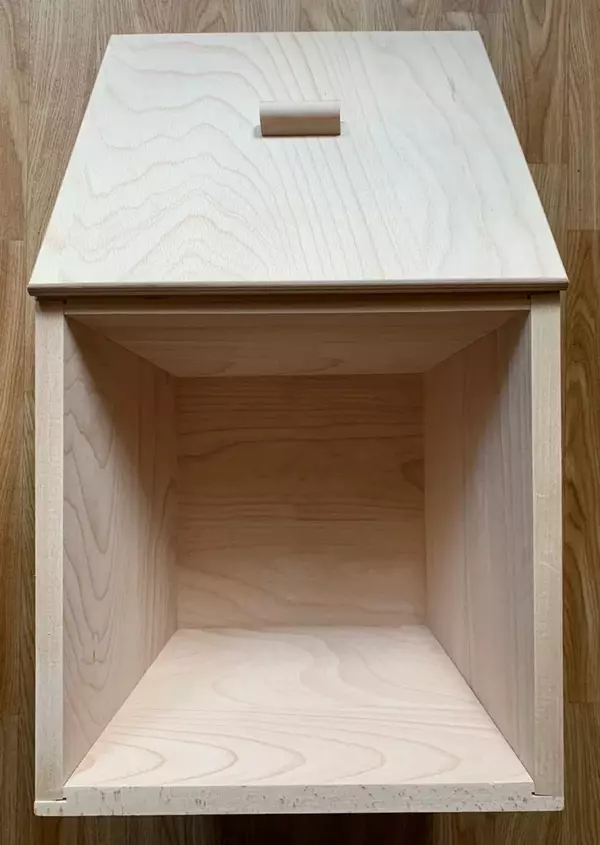
Wooden container
In the past in Italy, when there was no plastic, the dough was kept in wooden containers. And even today, some pizzerias use wooden containers. Plastic is certainly the more practical and hygienic material of the two. However, I was curious how the dough would come out and feel when stored in wood. I got myself a beech wood container for that reason. One thing first: wood pulls more moisture out of the dough than plastic.
With a natural material like wood, you should also be aware that the container and lid might not be 100% tight on each other, so drafts are possible (heavy books or binders can help in the medium term). Therefore, you should not leave the dough in the container for too long. In my opinion, it is therefore more suitable for wetter doughs (> 70% water content). The resulting drier dough will also affect the baking result. You will also need much less flour/semola (or even none in some cases) to shape the pizza.
When a food like dough comes in contact with a natural product like wood, you have to take care of it accordingly. It happens naturally that dough residues and flour remains on the wood. That’s why I first leave the box in the room without a lid for several days, so that the dough residues but also the wood can dry. Then I scrape away the obvious dough residues with the spatula and afterwards I thoroughly vacuum through the container and into all corners with the fine nozzle of the vacuum cleaner to remove the less visible residues and the flour. After that, the lid can go back on the container. With this method I get along well until today and also had no problems such as with mold.
Rating: nice to have
Learn more: Flat wooden container*
I also got myself a taller container to make the dough in, also made of beech wood. In Italian, this container is called Madia. The features and care instructions described above also apply to this container. However, I really use this container very rarely, as the care and cleaning are more elaborate than with the plastic dough storage container. In retrospect, I would probably not buy this container again.
Rating: nice to have
Learn more: Wooden container*
Garnishing the pizza
Food mill
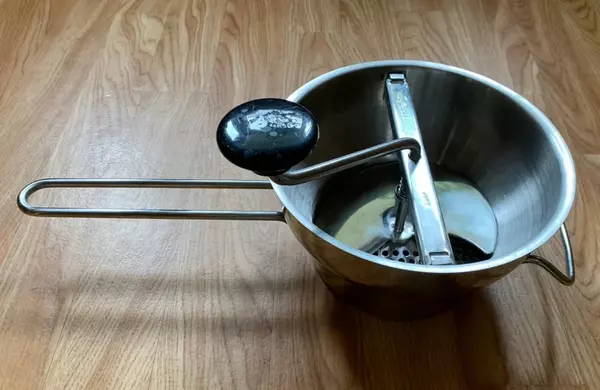
When making the tomato sauce for pizza, I like to use a food mill, because I like the tomato sauce with a fine and even consistency. Of course, you can also squeeze the tomatoes by hand, but that way you’ll have somewhat larger pieces in the sauce.
Rating: recommendable
Learn more: Food mill*
Kitchen grater
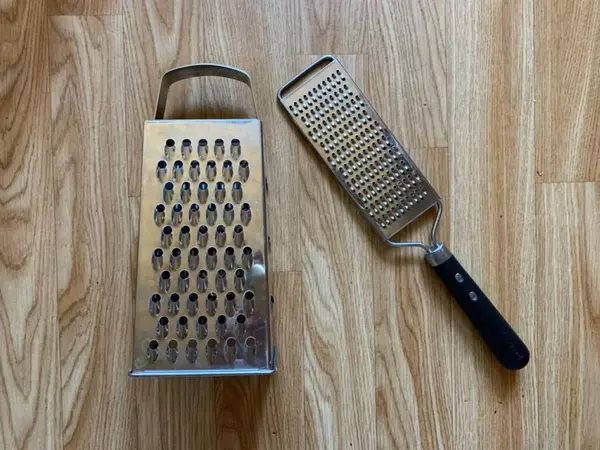
Graters are a practical tool when it comes to pizza toppings: they are suitable for grating hard cheeses such as Parmesan or Grana Padano into different sizes. But graters are also useful for grating lemon zest, for example, to give pesto or ricotta cream that certain something extra.
Rating: nice to have
Learn more: Grater 4 sides* & Flat Grater*
Vegetable slicer
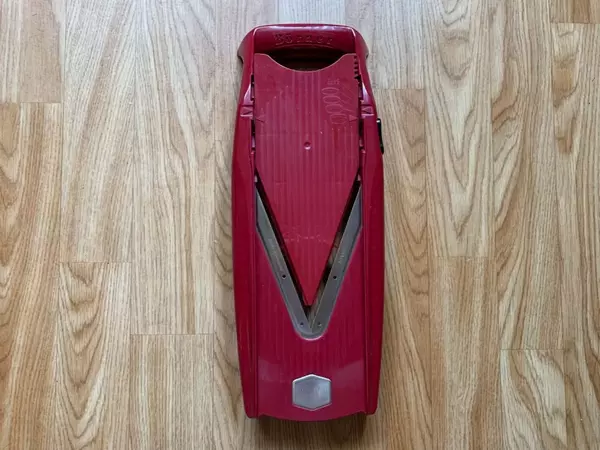
The vegetable slicer is one of my favorite tools when it comes to cutting ingredients into the thinnest slices possible. This can be the case for potatoes to put on a Roman pan pizza or for eggplant to make a pizza alla Parmigiana. Both taste incredibly great!
Rating: nice to have
Learn more: Vegetable slicer*
Blender
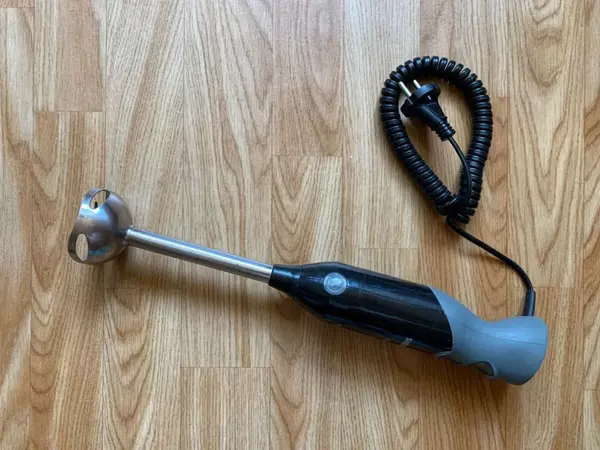
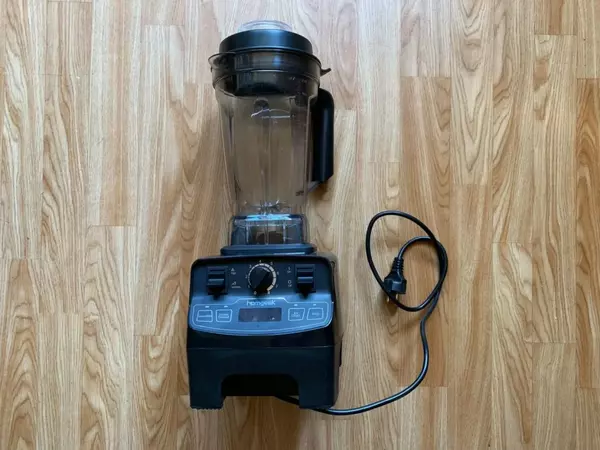
Blender come in very handy for different types of pizza toppings: with a handheld mixer (but also with a blender) you can, for example, quickly and easily make pesto as a pizza topping. A blender is good for making creams or sauces for pizza, e.g. for a pizza with roasted onion cream.
Rating: nice to have
Learn more: Hand blender* & Food Processor*
Baking the pizza
Pizza stone
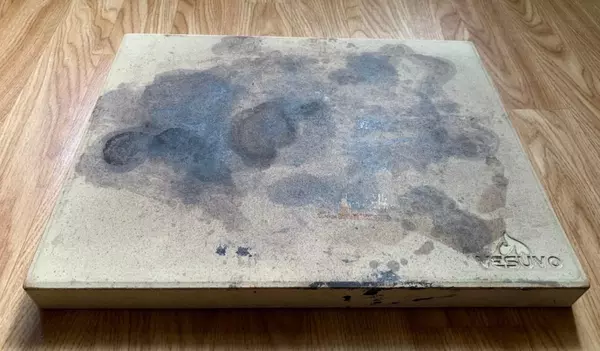
I would recommend a pizza stone to all those who bake their pizza in a normal household oven or grill and do not have a special pizza oven. Before I bought my pizza oven, I also used a pizza stone, in this case made of cordierite. The stone must be preheated in the oven accordingly (approximately 1 hour at the highest temperature). The thicker the stone, the better, as it can store more heat. The more heat it can store, the more heat it can give off to the dough. As a result, the edges rise higher and the bottom becomes crispier. In addition, the stone shortens the baking time of the pizza; in my experience, it takes about 7 minutes. In my opinion, a pizza stone can really take pizza to the next level.
More information: If you want to learn more about pizza stones, make sure to read my pizza stone article and frequently asked questions.
Rating: essential
Learn more: Pizza stone*
Pizza steel
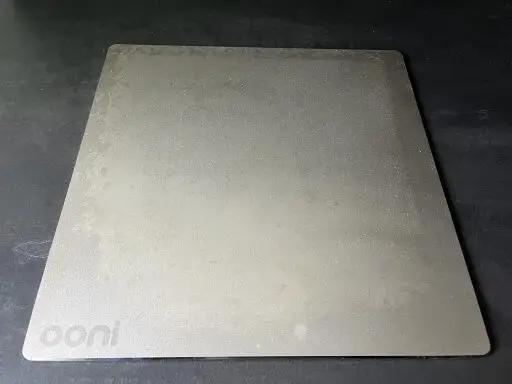
Like the pizza stone, the pizza steel or baking steel is intended as an tool for the household oven to bake the best possible pizza at home. Compared to the pizza stone, the pizza steel has a higher thermal conductivity, which has two advantages: on the one hand, it has a shorter heating time (approx. 30 minutes), which in turn saves more energy. Secondly, it can also transfer the heat to the baked food better, which means the pizza bakes faster and becomes crispier. However, in our opinion, those who already own a pizza stone do not necessarily have to switch to a pizza stone, as the baking results are not that much better. However, for those who are considering whether to buy a new pizza stone or pizza steel, we would recommend the pizza steel.
More information: If you want to learn more about pizza steels, make sure to read my pizza steel article and frequently asked questions.
Rating: essential
Learn more: Pizza steel*
Pizza oven – Electric
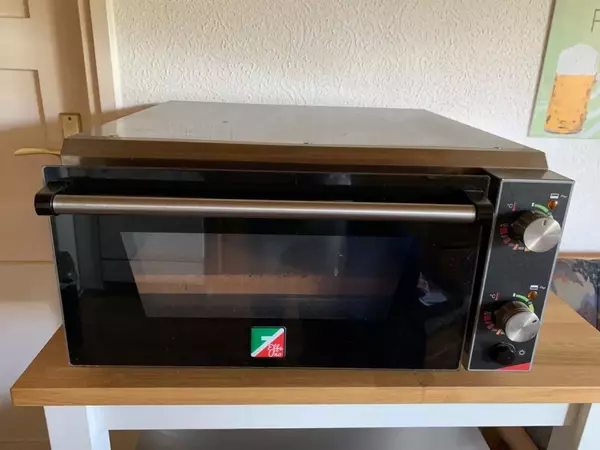
If you’re looking for the ultimate pizza game-changer, I think you should consider a pizza oven. Since my goal was to bake the most authentic Neapolitan pizzas possible, I looked for an oven that could bake pizzas within 60-90 seconds at a minimum of 450 degrees Celsius. I found this oven in the Effeuno P134h. It is an electric pizza oven. If you decide to buy the Effeuno, I would recommend ordering the Biscotto di Saputo stone at the same time. The clay from which the stone is made is quarried on the Gulf of Naples and has the characteristic of low thermal conductivity. This has the advantage that the stone does not heat up too much and the bottom of the pizza does not burn during baking.
More information: If you would like to learn more about this oven, make sure to read my pizza oven overview.
Rating: recommendable
Learn more: Effeuno P134h
Pizza oven – Gas
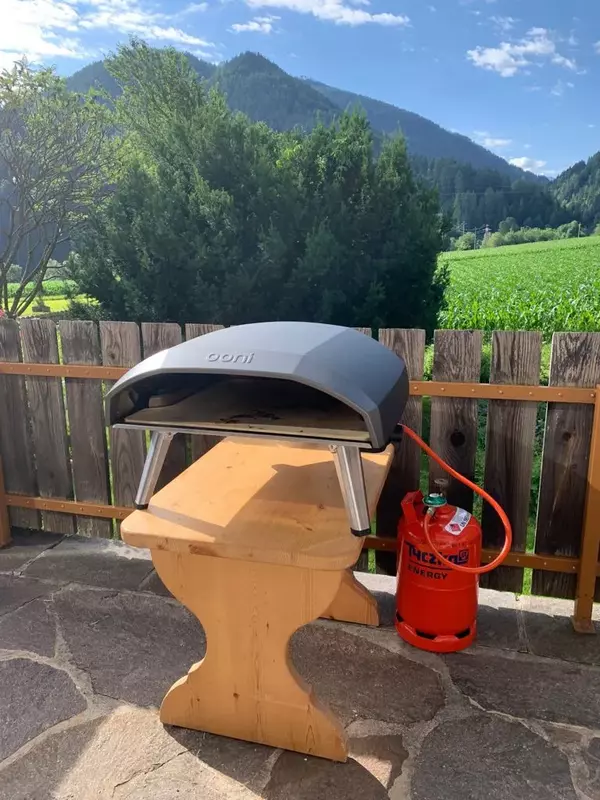
Besides electric pizza ovens, there are also gas-powered pizza ovens. In this case, we are talking about the Ooni Koda 16 gas powered pizza oven. Compared to the Effeuno P134h, the Ooni Koda 16 can even reach 500 degrees to bake a Neapolitan pizza. For this, it needs just 30 minutes of preheating time. Because of the L-shaped flames, you now need to turn the pizza less than compared to the “little brother” Ooni Koda 12. Unfortunately, the Ooni Koda 16 oven does not have a temperature display, but as you gain experience, you will get to know the oven’s heat control better. In terms of taste, however, electricity versus gas doesn’t make much difference in my opinion, because ultimately both ovens bring the right temperature to bake a Neapolitan pizza.
However, if you have a balcony, terrace or garden, I would certainly recommend a gas pizza oven, because when the weather is good, it is of course nice to be able to bake pizza outside and enjoy it with your guests. In addition, it is also incredibly fun to bake and turn the pizza with open flames. Even though the Ooni Koda 16 weighs 18 kilos, it’s still relatively easy to transport, so it’s great to bring along to outdoor parties. By the way, you don’t have to worry about bad weather, because Ooni has also thought of a weather protection hood.
More information: If you would like to learn more about this oven, make sure to read my in-depth review about it or my general pizza oven overview.
Rating: recommendable
Learn more: Ooni Koda 16* & Ooni Koda 12*
Pizza peel
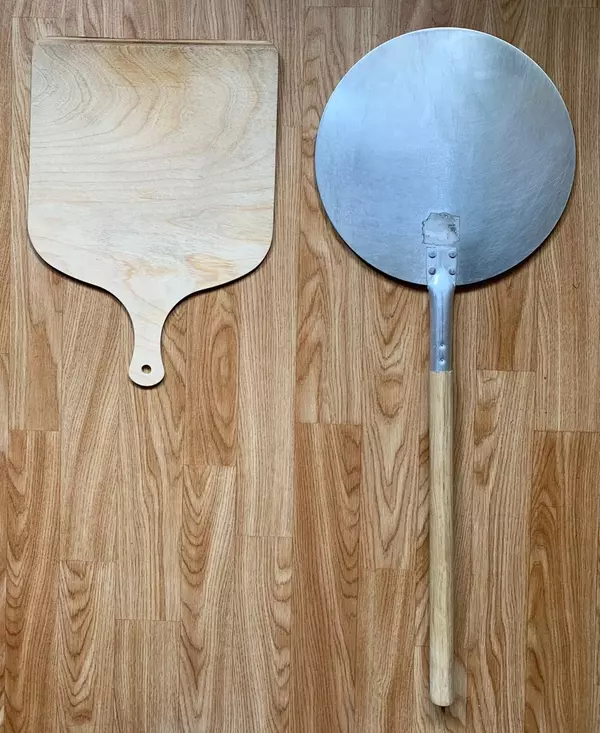
If you have a pizza stone, you should also have a pizza peel to get the pizza onto the stone. My pizza stone came with a wooden pizza peel (on the left in the picture). I still prefer to use this to place the pizza in the oven. What I like about wood is that the dough can slide easily on it. If you have a pizza oven and bake a Neapolitan pizza in it for 90 seconds, for example, I recommend using an additional pizza peel to turn the pizza and take it out (on the right of the picture). The peel should be as thin as possible so that it can slide easily under the pizza without accidentally slitting the bottom.
Rating: essential
Learn more: Wooden Pizza Peel* & Aluminum Pizza Turning Peel*
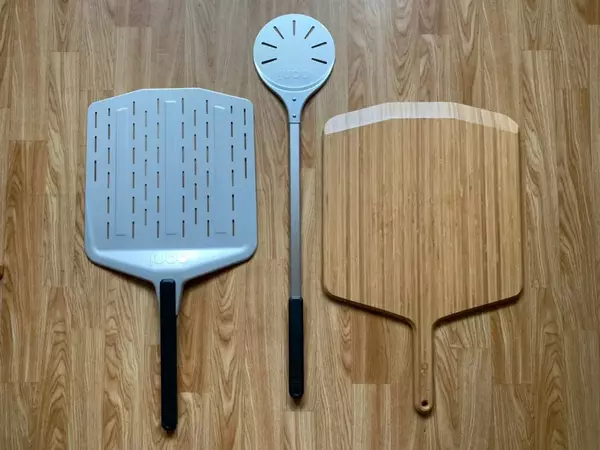
If you have an Ooni pizza oven, you should also think about the matching pizza peels. Of course, you could also use your existing pizza peels that you already have at home anyway. With the Ooni Koda 16, however, you should keep in mind that the oven offers for pizzas with up to 40 cm in diameter and for this reason alone, a correspondingly large pizza peel is necessary (left in picture). Since the pizza in the Ooni Koda is baked directly over an open flame, a pizza turning peel with a long handle is also helpful (middle in picture). A wooden pizza peel (right in pricture) is a practical alternative the to the aluminum one, as it also can be used as a serving tray – and on top, is visually definitely an eye-catcher!
Rating: recommendable
Learn more: Pizza peel* & Wooden pizza peel* & Pizza turning peel*
Baking pan – for roman pan pizza (Pizza in teglia or Pizza al taglio)
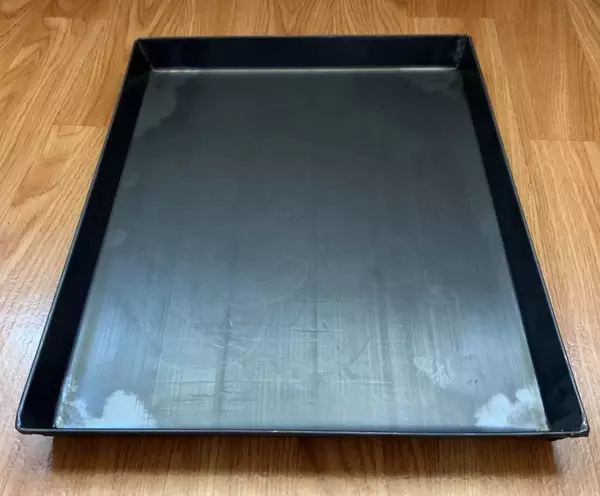
I am using a rectangular baking pan made of blue steel to bake the Pizza in Teglia alla Romana (Roman style pan pizza). Blue steel is a durable material that can withstand comparatively high temperatures (up to 400 degrees). Don’t be surprised if the pan might deform slightly during baking: as it cools, the deformation goes away. However, blue steel is not dishwasher safe and should only be cleaned with hot water. In my case, the pan is 35 x 28 cm and fits perfectly in the Effeuno oven. Of course, you can also use the baking pan that you already have at home for the household oven there; but my experience is that the pizza will not be as crispy as in a blue steel pan.
Rating: recommendable
Learn more: Rectangular blue steel baking pan*
Baking pan – for Detroit style pizza, Sicilian style pizza or Focaccia
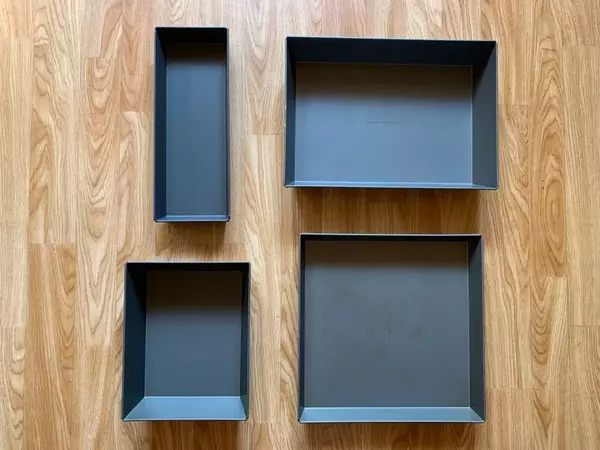
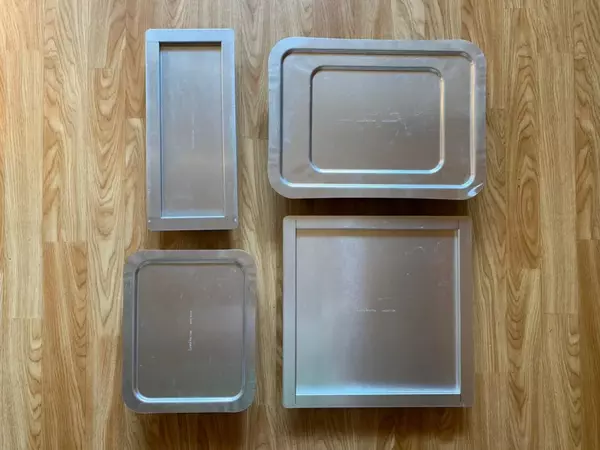
The baking pans from LloydPans deserve a special mention. LloydPans is a US company that manufactures various types of pizza pans and various accessories for baked goods in Washington. If you are interested in baking Detroit style pizzas, Sicilian style pizzas or even Focaccia, I would highly recommend the Detroit style pizza pans, Sicilian style pizza pans or even foccacia pans from LloydPans. They are made of anodized aluminum, are non-stick coated and heat resistant up to 270 degrees. The pans come in different sizes, for example, there are small Detroit style pizza pans (8 x 10 inch) and large Detroit style pizza pans (10 x 14 inch).
I have used pans from other brands and the ones from Lloydpans and I can tell you: compared to the other pans, the LloydPans pans are just unbeatable! Even if something should stick after baking – after a short soaking in water, all residues can be washed out easily with the sponge, the cleaning and care is really super easy! Please clean the pans only with hand, water and dishwashing liquid – never put them in the dishwasher! There are also matching lids for the baking trays. These are helpful and sustainable because with the Detroit style pizza, Sicilian style pizza and focaccia the dough has to rise for a few hours in the pan and is also initially spread out with the fingers at short intervals, and the lid thus protects the dough from drying out.
Rating: recommendable
Learn more: Detroit style pizza pan (small)* & Detroit style pizza pan (large)* & Sicilian style pizza or Focaccia pan*
Serving the pizza
Cooling rack
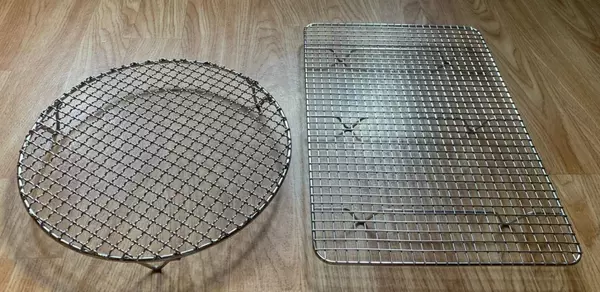
Who does not know it? You get the freshly baked pizza out of the oven full of anticipation and immediately put it on the plate or board. However, the heat on the bottom of the still steaming hot pizza can’t escape fast enough and “sweats” off on the plate. This makes the bottom unintentionally moist. I therefore place the pizza on a cooling rack immediately after baking so that the heat can escape from the base, leaving it dry (and crispy, for example, in the case of the Roman Style pan pizza Pizza in Teglia alla Romana). I use round cooling grids for round pizzas and square cooling grids for pan pizzas. Of course, you can also use the baking rack that you already have at home for the household oven.
Rating: recommendable
Learn more: Round cooling grid* & Rectangular cooling grid*
Scissors

Even though some people have already made fun of me: I prefer to cut my pizzas with scissors, because you have them in the house anyway and cutting pizzas with them is so easy. Also, many Italian master pizzaioli swear by the use of scissors because it allows you to better see the structure of the cornicione (pizza crust). But everyone is free to use any other kind of pizza cutter, of course.
Rating: essential
Learn more: Scissors*
Pizza cutter
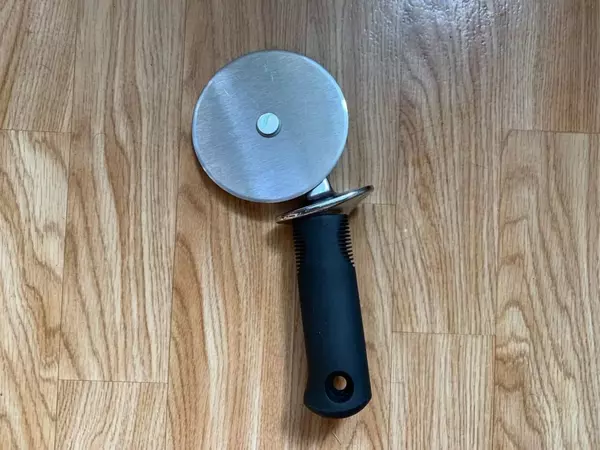
As described above, scissors are my tool of choice when it comes to cutting the “classic” round pizza. But a pizza cutter is also very useful. Especially when it comes to cutting thicker and larger pizzas, such as the Detroit style pizza, I like to resort to the pizza cutter because it really makes cutting easier. Crispier pizzas like New York Style Pizza also cut well with a pizza cutter.
Rating: essential
Learn more: Pizza Wheel and Cutter*
Serving and cutting boards
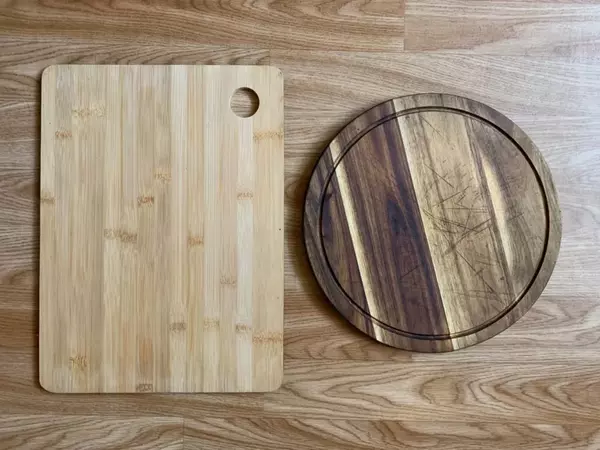
For cutting or serving the pizza I like very much to use wooden boards. On the one hand they are a solid base for cutting and on the other hand, they also look good in my opinion. Depending on the type of pizza, I use the square wooden boards for pan pizzas like the Roman pan pizza, Detroit style pizza, Sicilian style pizza or focaccia and the round wooden boards for the classic round pizzas.
Rating: essential
Learn more: Square wooden board* & Round wooden board*
Discover more
You’d like to start making pizza right away, but you’re wondering where to start? We have summarized the most important information on the following page for you.
Thanks for reading! I hope this page about pizza equipment was valuable to you. If you have any unanswered questions, feel free to let me know in the comments. I’d appreciate it if you could share this article with your friends.
Julia