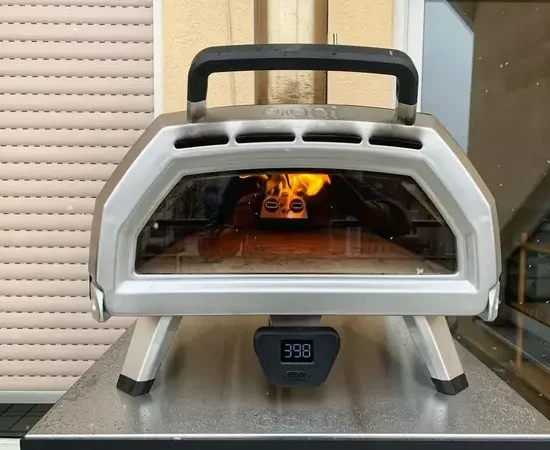
You love pizza, but the homemade pizza at home baked in the conventional household oven does not taste like in the restaurant? How about considering getting a pizza stone? A pizza stone is the perfect accessory to enjoy an excellent homemade pizza at home in the household oven. Before buying our dedicated pizza ovens, we first started using a pizza stone at home and we were definitely thrilled with the results!
Why should I use a pizza stone?
You’re probably familiar with this situation: when you used to bake a homemade pizza at home in the household oven, it usually took 15 – 20 minutes and it didn’t get really crispy. A pizza stone can change that. A pizza stone can store more heat due to its higher thermal conductivity and thus brings two advantages:
- the stone can deliver the heat better and more evenly to the dough, at the same time it also absorbs moisture through the open pores. This results in a crispier bottom and the dough edge rising higher.
- With the pizza stone, the baking time of the pizza is shortened. In our experience, it only takes about 6 – 8 minutes until the pizza is enjoyable. Thus, the pizza topping remains juicier and more aromatic and the edge remains soft inside. The shortened baking time also saves energy from the oven.
This allows you to turn your home oven into a stone oven just like in an Italian restaurant!
Which pizza stone should I use?
Most pizza stones are made of either fireclay or refractory ceramic cordierite. Both materials have in common that they have a high heat storage capacity and can absorb moisture well. Fireclay is particularly fireproof and is used, among other things, for the construction of fireplaces or tile stoves. Cordierite has slightly finer pores than fireclay and is therefore easier to clean and also does not break as quickly. So in the end, you’re not doing anything wrong with either material.
There are also different variants in the thickness of the stones, from 1.5 cm to 5 cm. Basically, you can say: the thicker the stone, the better, because it can store more heat. The more heat it can store, the more heat it can transfer to the dough and the faster and crispier the pizza is baked. However, thicker stones also take longer to heat up and are heavier. We find 3 cm to be a good compromise between optimal heat retention and handling. And in case you’re wondering: yes, our baking rack can withstand the weight of the stone to this day and the oven is also still intact 😉
Our recommendation: we recommend this pizza stone*
In the following table you have an overview of the stone thickness and weight to find the right pizza stone for you.
| Stone thickness (in cm) | Weight (in kg) |
| 1,5 | 3,7 |
| 2,5 | 6,0 |
| 3 | 7,5 |
| 4 | 9,5 |
| 5 | 11,5 |
How do I use a pizza stone?
The common stones that are available for purchase fit perfectly on the baking rack of a household oven in terms of size (approx. 30 x 40 cm). The pizza stone is placed on the baking rack, pushed into the oven on the middle shelf and preheated directly. You do not need to use baking paper or similar, the pizza is baked directly on the stone.
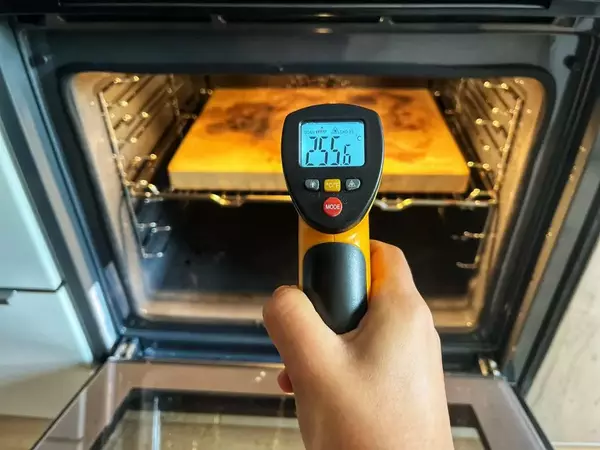
How long do I need to preheat the pizza stone?
Depending on the thickness of the stone, you should preheat it for at least 30 – 45 minutes at maximum temperature with top and bottom heat. The thicker the stone, the longer it needs to heat up. It is best to check the temperature of the stone with an infrared thermometer*, this should be at least 250 degrees.
How do I get the pizza onto the pizza stone?
To get the pizza or dough onto the pizza stone, we recommend a pizza peel. This is often included with the pizza stones (either made of wood or aluminum), as they are sold in sets. You can top the pizza first and then pull it onto the pizza peel, or you can top the pizza directly on the peel. Either way, follow these steps to bake the pizza on the pizza stone:
- First flour the pizza peel before you put the dough on the pizza peel, so that the dough does not stick to the peel.
- Before placing the pizza on the pizza stone, make a gentle shaking motion with the pizza peel in your hand to ensure that the dough slides well and that no part of the dough sticks to the peel. If a spot does stick, add a little flour and make the shaking motion again. The dough should not stick to the pusher at all.
- Now, with a quick shaking motion, place the dough on the stone and bake.
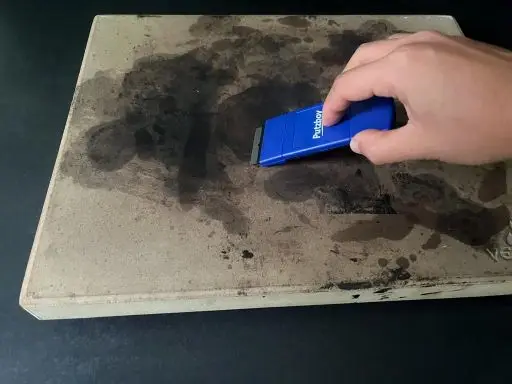
How do I clean a pizza stone?
During baking some things will obviously fall on the pizza stone: be it dough, cheese or tomato sauce. Unfortunately, this will leave stains that you can’t get out so easily and as a result, the stone no longer looks so great – but the stains have absolutely no effect on the quality of the pizza stone! If solid residues should remain on the stone, then proceed as follows when cleaning the pizza stone:
- Do not clean the stone during baking or while it is still hot. Always allow the pizza stone to cool completely first.
- After it has cooled, use a ceramic field scraper* to carefully remove any stuck-on residue from the stone.
- Use a dry kitchen towel to sweep the loose residue off the stone.
After that, the stone can be used again or stowed away.
Please do not clean the pizza stone with water or a damp cloth, otherwise water may penetrate the stone, causing cracks and in the worst case the stone may break.
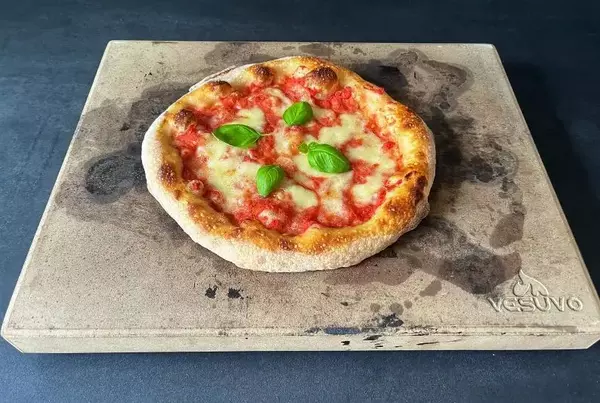
What do the baking results look like?
Now that we’ve cleared up all the theoretical questions, you’re probably wondering how the pizzas look like that were baked on a pizza stone in the household oven. Here are the pictures of a Pizza Margherita (baked with this recipe) that we baked in the household oven for about 8 minutes. The result is a pizza with a crispy base and crispy edges, but still soft inside – just delicious!
Discover more
You’d like to start making pizza right away, but you’re wondering where to start? We have summarized the most important information on the following page for you.
Thanks for reading! I hope this article about the pizza stone was valuable to you. If you have any unanswered questions, feel free to let me know in the comments. I’d appreciate it if you could share this content with your friends.
Julia