
Roman pizza includes several types: from the fluffy Pizza in Teglia alla Romana (Roman-style tray pizza) to the thin-crispy Pizza Tonda and the unique Pinsa Romana. Each of these pizzas has its own peculiarities that make them irresistibly delicious!
Roman Pan Pizza (Pizza in Teglia)
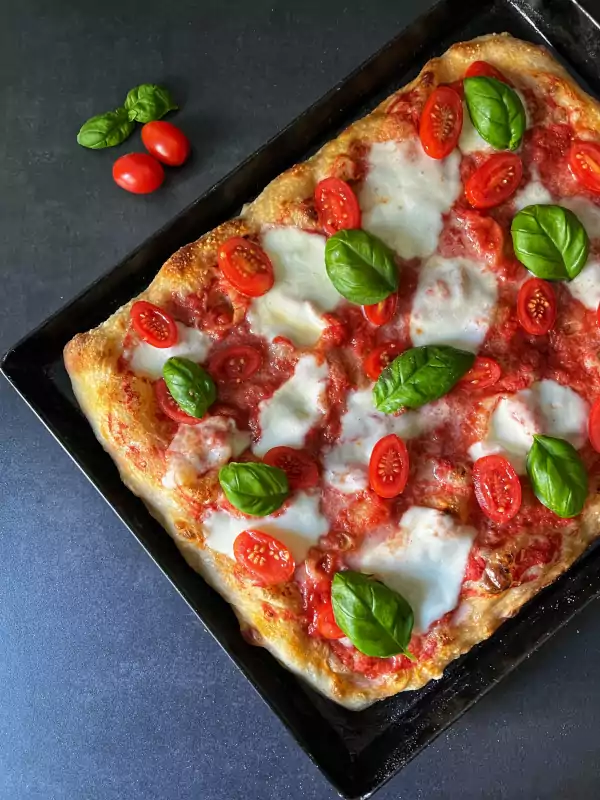
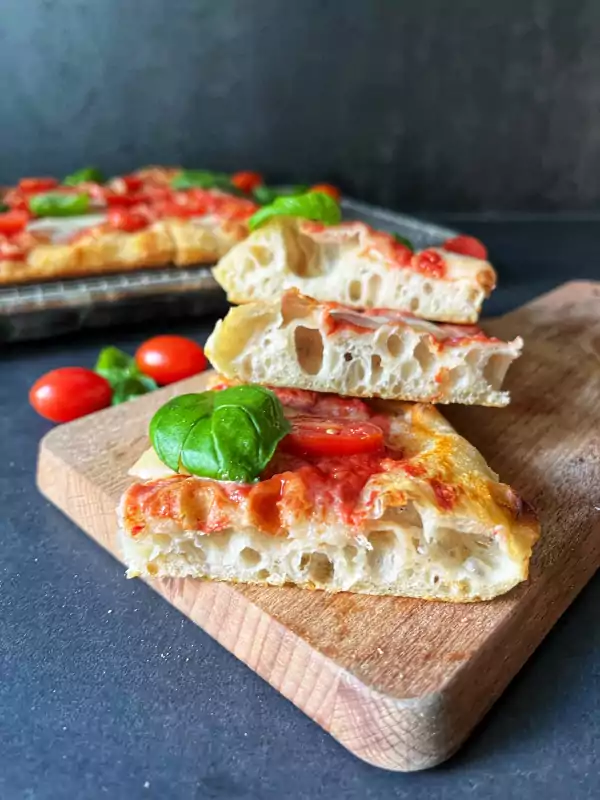
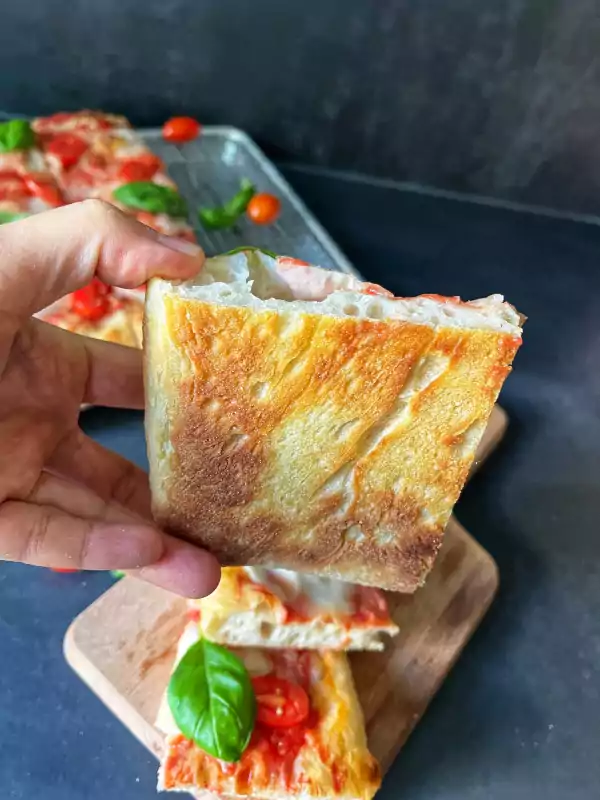
The Roman pan pizza or also better known as Pizza in Teglia alla Romana or Pizza al taglio captivates with its high water content of up to 90% and the long fermentation of at least 24 hours up to 72 hours. This gives the dough the beautiful air bubbles and makes it light and digestible. Compared to the Neapolitan pizza, the Pizza in Teglia is not baked directly on the pizza stone, but in a tray. The result is an airy soft crumb and a crispy base!
In Rome, this type of pizza can be found on almost every street corner: the various pan pizzas are lined up next to each other in the counter, which are then sold by the piece (pizza al taglio). The pizza can therefore be eaten well as a snack between meals. In addition, the pizza is available with different toppings – from classic Margherita to potatoes!
For this recipe, the dough has to rest a total of 72 hours. So if you want to eat the pizza in Teglia alla Romana, for example, Saturday evening, you should already start making the dough on Wednesday evening.
Also, with the high water content in the dough, a food processor or kneading machine is an advantage.
Ingredients
(for two portions of 500 gr and a baking tray of 35 x 28 cm)
- 550 gr Caputo Saccorosso flour (of course it can be another flour, but preferably with high protein content (>12%))
- 2,5 gr fresh yeast
- 440 gr water (important: ice cold, e.g. chilling with 2-3 ice cubes, the ice cubes are to be included in the weighing)
- 14 gr fine salt
- 14 gr olive oil
Dough preparation
- Put flour in the bowl of the kneading machine
- Sprinkle with yeast
- Start the machine on slow speed (speed 1)
- Slowly add 75% of the water (within 1.5 minutes)
- When the dough has reached a firm and uniform consistency, slowly add the rest of the water, a sip at a time. It may take up to 20 minutes for all the water to be incorporated.
- Add salt slowly
- Add oil slowly
- For kneading machines with multiple stages: In the last 2-3 minutes, I continuously increase the speed to the highest level.
In total, the kneading time is about 20 min. The final temperature of the dough should preferably be ~ 23 degrees.
Note: Of course, I am aware that at the beginning of a new recipe attempt not everything goes smoothly, a lot of practice and own experience values are required. I have also already had to knead 26 minutes until all the water was incorporated and the dough had already reached the 26 degrees, whereupon I was then also already nervous. But all good: from the dough has become a delicious pizza in the end anyway. It must and can not always run exactly according to the recipe, but you can still call ideal values 🙂
- Then transfer the dough from the bowl to the countertop, and shape it into a ball with a smooth surface.
- The dough may still be quite unstable or run at this point.
- If you still have time because of this, I recommend folding the dough twice each time at 30 minute intervals (so a total of one hour). This process will greatly increase the stability and firmness of the dough.
- After the two folding sessions, place the dough in a bowl with a lid and let it rest at room temperature for 1 – 2 hours.
- Then place the bowl in the refrigerator for 48 hours.
- After the 48 hours, take the dough out of the refrigerator and divide it into two equal portions and put each in a box with a lid.
- Then place these boxes in the refrigerator for 24 hours.
- Before baking, take the boxes out of the refrigerator for about 3-4 hours and let them rise at room temperature (a little longer in winter than in summer).
Shaping, topping and baking
- Preheat the oven to 250 degrees top and bottom heat at least 1 hour before baking.
- Brush the tray with a little olive oil.
- It is best to use semola for shaping the doughs. Gently “massage” the dough with your fingers to spread it out.
- Carefully place the upper part of the dough over one hand (over the left hand for right-handed people) and then lift the lower part with the other hand, placing it on the baking tray in this way.
- Spread dough in baking sheet until it reaches the corners.
- Cover and then bake at 250 degrees for about 15 min (depending on toppings and degree of browning, possibly a few minutes longer).
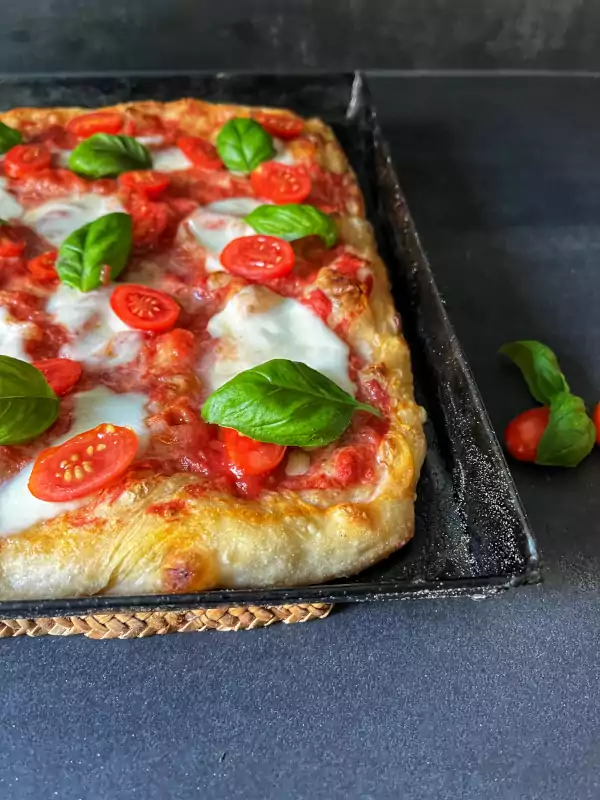
- Cut the finished pizza into smaller pieces and serve.
This is what the finished Pizza in Teglia alla Romana looks like

By the way, you can also watch the following video for step by step instructions on how to recreate this recipe:
Make sure to check out my Youtube channel for more pizza related videos.
Discover more
You’d like to start making pizza right away, but you’re wondering where to start? We have summarized the most important information on the following page for you.
Thanks for reading! I hope this page with Roman pizza recipes was valuable to you. If you have any unanswered questions, feel free to let me know in the comments. I’d appreciate it if you could share this article with your friends.
Julia
Hey!
Why do you recommend cold ice? Just because of the heat of a long mix?
Hey Tom,
especially for high hydration doughs, it is recommended to keep the dough at a lower temperature to maintain a stable dough/gluten structure.
Cheers
Julia