
With this 100% Biga Pizza recipe, you will get one of the finest, lightest pizzas you will ever eat! In this post, we’ll show you step-by-step how to make it!
What is Biga?
Biga is a type of preferment, which is prepared with water, flour and a small amount of yeast. The hydration (= water content) of the Biga is 40-60%, i.e. for example, for every 1000 gr of flour there are 400-600 gr of water. Due to this lower hydration, the Biga is a firmer pre-dough compared to a poolish pre-dough. The yeast content in the Biga pre-dough varies from 0.1-1% depending on the recipe. 100% Biga means that the entire quantity of flour (= 100%) is processed in the Biga.
Biga doughs are said to bring a special sour note to the taste due to the longer and cooler proofing time, resulting in both a longer shelf life and better digestibility of the dough.
By the way, there is not THE Biga recipe. We have tried different variants in recent years, e.g. varied the yeast content (up to 1%), the Biga fermentation at different temperatures (4-7 degrees Celsius; 16-20 degrees Celsius) and have finally achieved the best result with this recipe – but please convince yourself
Instructions for the preparation of the Biga
You can make the Biga pre-dough by hand as well as with a dough mixer (a regular KitchenAid stand mixer is also perfectly fine). However, for the preparation of the main dough we would recommend a mixer because the Biga has a relatively firm consistency due to the low hydration and the kneading and the incorporation of further liquid by hand can be very difficult.
From our own experience we can say that making a Biga dough can be challenging and needs several attempts and learning experiences, especially in the beginning. But practice makes perfect!
For this recipe, the dough should rest for at least 24 hours. This recipe yields about 6 dough balls of 280gr.
Ingredients for the Biga
- 1000 gr flour (Tipo 0 or Tipo 00 flour with W300-350)
- 500 gr water
- 0.8 gr instant dry yeast (or 2.5 gr fresh yeast)
Preparation of the Biga
- Put the flour in a bowl. Pour the water into a measuring cup.
- Add the yeast to the water and stir briefly with a fork until the yeast has dissolved.
- Now slowly add the yeast-water to the flour and mix by hand or with a dough mixer.
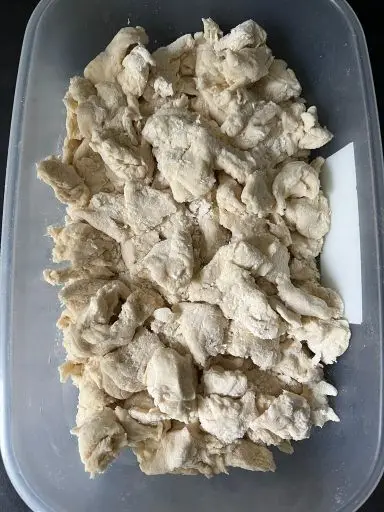
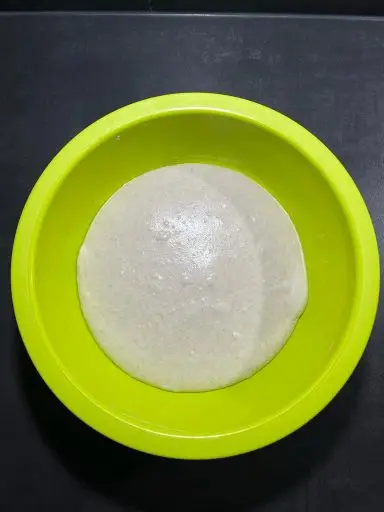
- If you knead by hand, you’ll notice that the dough is very dry and lumpy – it’s supposed to be! The Biga pre-dough is not a whole dough in one piece but resembles a pile of dough lumps or scraps. It’s perfectly normal for not all of the flour to be incorporated into the dough pieces, and for there to be dry flour scraps left over.
- If you knead with a dough mixer, it is enough to knead the dough for 3-5 minutes. Not all of the flour needs to be incorporated and it can be normal for dry flour residue to remain. The dough will then resemble a larger, cohesive mass. You will then pluck this dough mass into smaller pieces (see pictures).
- Place the Biga dough pieces in a sealed container and add the dry flour scraps.
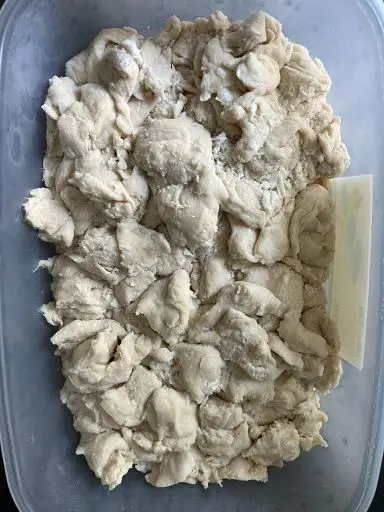
- Now close the container, let it rest for 2-3 hours at room temperature and then let it rest in the refrigerator for at least 18 hours to a maximum of 24 hours.
- After the fermentation you will see that the Biga has developed into a coherent mass and has also increased in volume (see pictures).
Ingredients for the main dough
- 100% Biga
- 200 gr water (preferably cold, e.g. cool the water beforehand in the refrigerator or with ice cubes)
- 3-6 gr of baking malt (powder)
- 25 gr fine salt
Those who are more experienced with higher hydrated doughs can also increase the amount of water, for example from 200 to 250 gr; thus the dough would have a total hydration of 75% instead of 70%.
Preparing the main dough
- Roughly cut the Biga into 3-4 pieces with scissors and place in the bowl of the dough mixer.
- Turn on the dough mixer on the lowest speed and knead the dough.
- Now add the water a little at a time.
Important: make sure to add the water really slowly in small amounts and only add it when the water has been absorbed by the dough. It may take up to 10 minutes for all the water to be absorbed by the dough. - If you have a dough mixer with multiple speed settings, you can also increase the speed after about 3 minutes so that the dough, which is still relatively firm, can be kneaded thoroughly.
- When the dough has absorbed all the water, add the baking malt.
- Then add the salt.
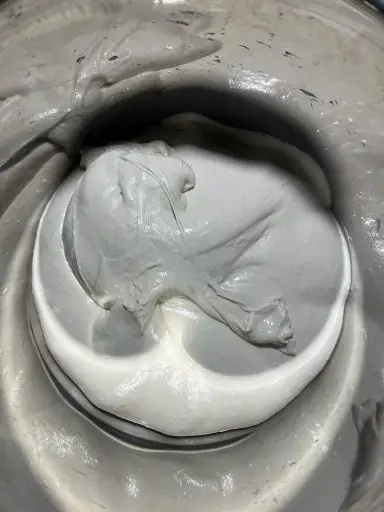
- After about 15-20 minutes of kneading, the dough should be kneaded out and have developed a stable consistency. Now shape the dough into as round a ball as possible, place it in a sealed container (see how to shape the dough into a round ball in this video).
Resting the dough
With this recipe you can decide how long you want to let the dough rise. If you are short on time or don’t want to wait that long, you can use the dough to make pizzas after just 4 hours.
However, to get the most flavor, lightness and airiness out of the pizzas, we recommend letting the dough rise for up to another 48 hours.
The short variant
- Allow the dough to rest as a whole at room temperature for 1-2 hours (bulk fermentation).
- Then divide the dough into six portions, each weighing about 280 gr.
- Shape the portions into round dough balls (see this video for how to do this), place them in a sealed container and let them rest for another 2 hours at room temperature (balled fermentation).
- The dough can then be baked directly into pizzas.
The long variant
- Let the dough rest as a whole for 1-2 hours at room temperature and then put it in the refrigerator for 12-24 hours (if you don’t have time, you can skip the fermentation at room temperature).
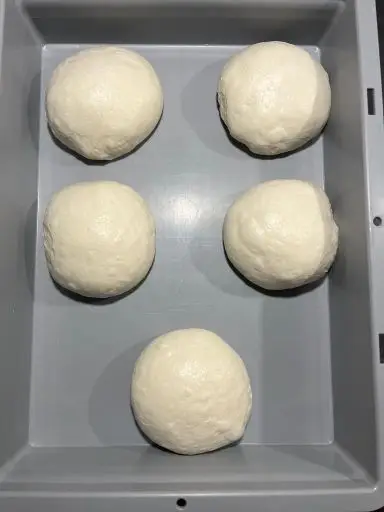
- Then divide the dough into six portions, each weighing about 280 gr.
- Form the portions into round dough balls (see this video for how to do it), put them in a sealed container, let them rest for 1-2 hours at room temperature and then put them in the refrigerator for 12-24 hours (if you don’t have time, you can skip the fermentation at room temperature).
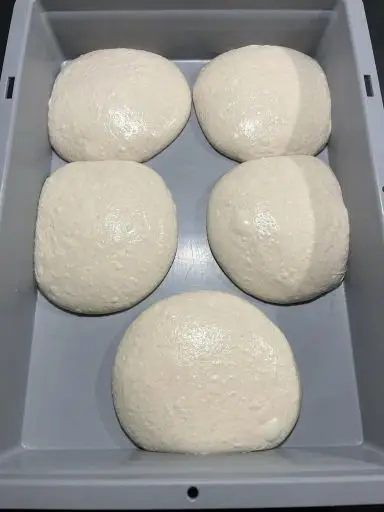
- On baking day, take the dough out of the refrigerator about 2 to 2.5 hours before baking and let it acclimate at room temperature.
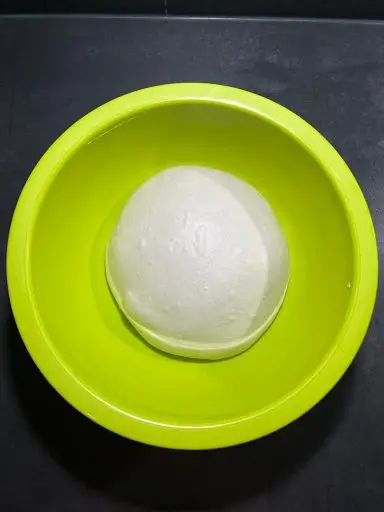
The following pictures show the dough after the long variant.
Shaping, topping and baking the pizza
In the household oven
- Preheat the oven to maximum temperature with top/bottom heat about 1 hour before baking. If you have a pizza stone or pizza steel, heat it up as well!
- Prepare a bowl or a deep dish with Semola (flour works as well).
- Sprinkle the dough with a little Semola (especially on the edges), and take it out of the dough ball box with a spatula, put it into the bowl/plate with Semola and turn it over in it.
- Then place the dough ball on the work surface and shape it by hand: if possible, starting from the center, press the air bubbles towards the edge and shape it into a round pizza, leaving a border. Please do not use a rolling pin, as this will destroy the air bubbles.
- Top pizza with ingredients of your choice.
- Carefully pull pizza onto pizza peel*. Pull again on the pizza peel to make it round if necessary.
- Place pizza in oven and bake for about 7-9 minutes (depending on whether you use a pizza stone or steel, it may take a little longer or shorter).
In the pizza oven
- Preheat the pizza oven to 400 degrees Celsius about 1 hour before baking.
- Prepare a bowl or deep dish with Semola (flour will work if necessary).
- Sprinkle the dough with a little Semola (especially on the edges), and using a spatula*, take it out of the dough ball box*, put it in the bowl/plate with Semola and turn it over in it.
- Then place the dough ball on the work surface and shape it by hand: if possible, starting from the center, press the air bubbles towards the edge and shape it into a round pizza, leaving a border. Please do not use a rolling pin, as this will destroy the air bubbles.
- Top pizza with ingredients of your choice.
- Carefully pull pizza onto pizza peel*. Pull again on the pizza peel to round shape if necessary.
- Place pizza in oven and bake for about 90-120 seconds (a little shorter or longer depending on your preference and degree of browning).
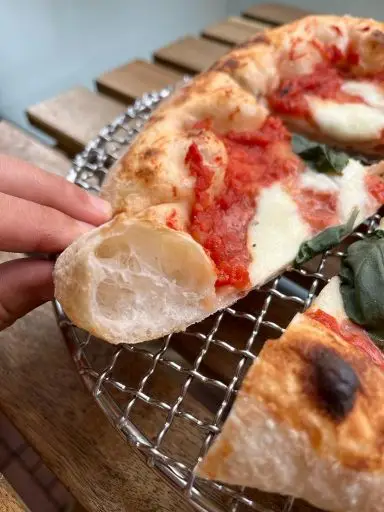
This is how the finished Biga pizza looks like (baked in the pizza oven)

Discover more
You’d like to start making pizza right away, but you’re wondering where to start? We have summarized the most important information on the following page for you.
Thanks for reading! I hope my Biga pizza recipe was valuable to you. If you have any unanswered questions, feel free to let me know in the comments. I’d appreciate it if you could share this article with your friends.
Julia